GOING DEEP WITH ACOUSTICS – INTERVIEW WITH MATT DAVIS
One of the hardest things for any engineer or producer to get right isn’t the mix, its not even the music… it is the acoustics of the room they are sitting in. It’s a no brainer that this is one of the most important and crucial aspects of knowing what you are hearing and in return; engineering and producing with confidence in your work and decisions. So, we are happy to bring in a pro-topnotch-acoustics engineer (and well-known mastering engineer) Matt Davis of Hacienda Mastering to talk about all things Acoustics, for big and small studio spaces!
First off, a little about Matt Davis before we dive into the deep! Matt Davis is the founder of Hacienda. He is a graduate of both University of Miami’s Music Engineering undergraduate program and NYU’s Music Technology masters program. Over the course of a decade, Matt has had the privilege of mastering music for hundreds of artists and labels of varying genres, styles, and acclaim. He has trained under grammy winning mastering engineers, notably Bob Katz of Digital Domain.
Matt is currently an educator in the Recording Arts program at Full Sail University, and has been employed as a professor in audio programs at several other accredited US colleges.
Outside of engineering, Matt is a prolific electronic musician with releases covering many genres on several labels under different monikers. And his passion for acoustics has brought him around the USA to install acoustics into studios; both big and small!
Let’s get started with Going Deep in Acoustics with Matt Davis!
BOS – So, let’s start with a bit of background. What got you into Acoustic Treatment?
Matt – The real jump off point for acoustics was buying my first pair of PMCs a few years back, and feeling inspired and driven to optimize my playback environment in order to do them justice. My friend and mentor, Bob Katz, was teaching me the fundaments of room analysis and DSP alignment which I found fascinating, and I began digging into applied acoustics. I was moving into my current studio at the time and thought that social media might appreciate me documenting my design and build in detail and with ‘on site’ data. That series of posts got quite a bit of traction and sent the first few clients my way, they have since then recommended me to their friends and the demand for my firm has been growing ever since.
BOS – How long have you been Mastering and doing Acoustic treatments?
Matt – My interest in mastering started at NYU in 2009. I was fortunate enough to have enrolled in a course taught by Alan Silverman and the way he described the discipline resonated with me immediately. I’d been doing a ton of tracking/production/mixing before then, but the process of mastering really spoke to me. I’ve been actively developing the skillset since then and started offering it as a service in 2010. Acoustics is much more recent of a development for me, I started taking clients in 2017 shortly after the first phase build of my current studio was complete.
BOS – Why is it important to have a good room and acoustics, even for smaller rooms and studios?
Matt – I don’t think most people appreciate how much easier the process is when you’re starting with a trustworthy reference point. I spent years flying blind as a producer, aligning my systems by ear to an abstract and uncertain subjective target, using multiple monitoring systems which prompted more confusion than clarification, and having to religiously check my work on a variety of playback systems to vet the choices I was making in the studio. The more variables that can be controlled for in their playback environment the more authority one will have in making informed engineering decisions. It is incredibly empowering to have a sound system really working in congress with the room that contains it and not needing second opinions for translation as a result of that. The reduction of temporal masking which comes with getting a room’s RT60 into spec as part of the design process makes for a much more revealing playback experience which results in lower monitoring levels, less fatigue, and greater contrast of mix issues, making for faster work and less fishing around to find the issues. Having modal issues reigned in through applied acoustics and an appropriate house curve tailored to the preferences of the engineer makes the process of balancing low end to upper spectra and tailoring the decay of bass instruments more consistently accurate regardless of the key of the program material. Being in spec also lowers the delta in translation to other sound systems, which greatly improves the odds of creating a mix/master that translates to the widest variety of playback systems. Lastly, having a tightly controlled reflection free zone around the mix position yields much greater localization of sound sources in the stereo image for more accurate representation of panning and improved ambience decoding to make sound-staging decisions with a greater degree of precision and confidence.
BOS – If someone doesn’t have access to an acoustics engineer or being able to treat their room, are they better off just using Headphones?
Matt – I’ve heard some really nice mixes and masters being done on good headphones lately, and I would certainly prefer working with accurate playback through a revealing pair of headphones over working on mains in an untreated room. There are some great DSP tools coming out which blur the line between the presentation of monitors and headphones which I think have a good degree of utility in cases when a properly aligned sound system is unavailable. I exclusively work on my mains, even for QC work, but that is as a result of a great deal of investment in a room which is revealing enough for that task, the scope of which is far beyond something that could be done in a rental situation, for instance.
BOS – How does a professional such as yourself, check the room ‘mode’ and apply the acoustic treatment? What gear is needed?
Matt – We are in a golden era of acoustics analysis, thanks in large part to the tireless efforts of John Mulcahy at Room EQ Wizard. For anyone not familiar, Room EQ Wizard is a free suite of analysis/modeling/filter design modules that rivals anything else out there, a real gift to the DIY and professional acoustics communities. A copy of REW and a decent measurement mic is all you need to get started on room analysis. A decent mic will put you back between $100-$400. Room simulations can be done within REW to relate the issues you’re seeing in the frequency response plot to physical phenomena in the room itself and predict the results of added absorption to individual walls, as well as the impact of moving the mix/speaker positions around.
BOS – Is it OK for people to go online and read “how-to” on acoustic treatment and get by with a better room, or does this cause more harm than good without a professional there to help?
Matt – Sure, it worked out pretty well for me. Although my firm generates revenue from clients trusting us with design work and implementation, I come from deeply DIY roots and have a passion for empowering other DIY’ers. In the coming months we will be creating web content specifically for the purpose of educating producers/engineers working in home studio spaces on optimizing their less than ideal rooms. My intention in the near future is to build a series of test rooms which use common residential dimensions and wall compositions and comparing design methodologies in situ to search for the most optimal and economic design implementations in residential scenarios. It is my belief that the data generated and publicized will be useful to a broad cross-section of the home studio community who are working in similar conditions to our test environments.
BOS – What are different ways to treat a room with acoustic treatment?
Matt – The goals of any listening room are consistent regardless of how odd a given space may be. Those goals are modal control, early reflection control, and optimization of the time domain characteristics of the space. There are many tools available to meet these goals which are more or less applicable in different scenarios. You will find in most forums that you may get different answers to a given question from different acousticians, and I believe this largely to be driven by their integration into larger questions of design methodology. There are many routes to the destination of optimized sonics, and the efficacy of the overall system is the sum of those components working in conjunction with each other to meet spec. Some acousticians rely heavily on pressure traps, others work exclusively with velocity trapping, many use both to varying degrees. Some use a two stage approach of over trapping for modal/RFZ control and utilization of extra diffusion to get back into RT60 spec after the fact, others take a more minimal approach, others use a series of narrowband elements with carefully selected crossovers to avoid overtrapping in the first place. The important part is the destination more so than the sum of components that get you there, but the available toolkit of options is large in acoustics and create a fortuitous opportunity to impart an acoustician’s particular style on a design.
BOS – How can up-n-coming producers with small rooms and small setups increase their listening position and quality of playback? Can they do anything by themselves to make it better?
Matt – Absolutely, get some analysis software and start trying stuff. There is more latitude in manipulating frequency and phase domain response via moving speaker and mix positions around that just about anything else within the scope of small room acoustics. Picking the right spots for your speakers and yourself will carry you very far, even in an undertreated space. I recommend people start with their mix position 38% of the way from their front wall to their rear wall. Take a measurement, what is your low end doing, is it above the center of gravity for the rest of the frequency response or below it? Moving your speakers closer to their nearest rigid boundary (the front wall) will act as a boosting shelf below the baffle step frequency of your speakers, moving it further away from the front wall will act as a cutting shelf. Once you have that balance established then start experimenting with your mix position location. Try a foot forward, try a foot back, which one looks nicer? Go with that one. Which wall did you choose to be your front wall, what is the composition of that wall? What about the side walls, are they interior walls or exterior walls? A very unfortunate and common scenario in home studios is a mix of interior and exterior walls. If you have an interior side wall and an exterior side wall those boundaries will behave differently than each other as a result of their varying mass and rigidity. You can think of a boundary as a highpass filter to sound, the more rigid and massive the boundary, the lower the center frequency of that highpass and the more energy kept in the room. The ramifications of this are that different amounts of low frequencies are being “absorbed” by being allowed to pass through the wall, and also being re-radiated out of phase back into the room through tympanic resonance of flimsy drywall sheets with no insulation in the cavity to dampen the resonance. By mixing and matching these on your sidewalls you will have variance in sound pressure at the boundaries, resulting in asymmetrical frequency/phase responses which result in worsened stereo imaging. The best case scenario for a room with a good dimensional ratio is to also have “ideal” massive/rigid boundaries on all walls, as these are predictable in simulation and create good modal support which in turn yields good subrange presentation. Whenever possible try to set your front wall such that your sidewalls are both either interior or exterior as it will improve your imaging strength. I’ve had very good luck in rooms with rigid front and sidewalls with a flimsier back wall. The massive front wall helps acoustic loading of the low end into the room, the uniform sidewalls provide symmetry, and the “leaky” backwall permits deep subrange energy to leak out of the back of the room, requiring less deep trapping to reign it in. Beyond that just start buying fiberglass and sticking it on your walls. This is obviously a gross oversimplification of applied acoustics, but it is very hard to do worse for sonics than untreated drywall.
BOS – With your Mastering Studio, what all did it take to get it to sound as it needed to, in order to do high end Mastering?
Matt – Years of blood, sweat, and tears. My room didn’t play nicely at first, and I developed most of my skillset in applied acoustics through trying things and revising things that didn’t work. There were several iterations of sidewall trapping revisions with different insulation types and depths, most notably in the reflection free zone to make my PMCs play as nicely as possible in a room that is a little too narrow for farfield monitors. The front wall has been redesigned three times, landing most recently on my waveguided softflush implementation. The core of the cloud and soffit area treatment has been modified several times as well. I’m actually about to integrate some membrane traps above my clouds to reign in the last trace of modal ringing in the room, a little 60hz from the fundamental height mode. The room is unique in that it has served me both as a mastering room and an R&D space. This obviously makes for logistical issues in terms of downtime for my mastering clients, but we work very quickly in acoustics revisions to ensure their deadlines are met.
BOS – What is the most important thing about anyone’s production space? Is it the gear? The ear? The room? Or a combination thereof?
Matt – Again, the most important aspect is the sum of parts. I’ve worked around pretty compromised playback environments in the past and although it wasn’t fun I somehow managed to come up with mostly agreeable results, the process just was a lot slower. This impacts the pacing and momentum of the session, for some people this can be worked around, for others it will be a deal breaker. I personally believe the monitoring environment is of paramount importance to the process, but everyone’s process is a little different. I encourage everyone to try a session in a controlled listening room to see how the other side lives, it may be eye opening. I enjoy inviting my mastering clients to come audition their mixes in my room as it gives them a center of gravity to take home with them and inform their mixing decisions. The truth can be very surprising to them at times and often results in better mixes after the fact.
BOS – Are there any tips and tricks that you can give the readers to help them further in their career?
Matt – Stay objective, keep yourself honest, A/B everything you do, compare your new work with old work, gracefully accept constructive criticism from people whose work you respect. Most importantly be patient with yourself, this was far from an overnight success for me and I’m glad I stuck it out.
BOS – What do you love about the music industry?
Matt – So, I’m actually pretty anti-industry. I started my own outfit in an effort to stay independent from outside influence and most of my foundation of practical knowledge was self-taught via trial and error. I don’t seek out major labels nor high-profile artist clients. My goal with the mastering house was to create a world class facility focused on independent labels/artists who I prefer working with and whose work I personally respect. I enjoy the autonomy that working in underground scenes affords me and am not really interested in working any other way.
BOS – What do you hate about the music industry?
Matt – The design by committee tendencies are particularly annoying to me. The involvement of a team of specialists should afford a degree of independent control to the contributors in the production process, but I find that to be less the case the further you lean into the industry at large. All professional relationships should be grounded in mutual trust and the erosion of those boundaries of respect are something I see as being kind of misguided. Also, they all want their masters too damn loud, and I’m not interested in indulging that.
So there you have it! From the man himself. This is a VERY important topic that I think every walk-of-life and both rookie or advanced professionals in audio can get something from. Thanks, Matt, for sitting down with us! You can check him out at the links below!
Going Deep with Plugin Development – Interview with Marc Adamo
We all use them. We all know about them. But what really goes on behind the scenes (and hood) of plugins and plugin development? Since 1992, with Waves first audio plugin called the Q10 Paragraphic EQ, we have seen a massive rise, and overall must-have scenario for audio plugins. It is surreal to think back and realize that at one point and time there was no recall and everything was in analog domain. The past 30 years have been a constant battle for Plugin Developers to take center stage. Marc Adamo, the developer behind ADPTR, knows this best, and this is why we decided to interview him about how this all works, and about his new plugin out now on Plugin Alliance called Streamliner.
First, a little background about Marc. Marc and I met at the Waves hang in Los Angeles at NAMM in 2020. I have done a lot of work for Waves as Audio Journalist and Marc has been a heavyweight industry hitter for many years, and working with all the plugin giants. His first plugin on Plugin Alliance called Metric A/B (Watch Video about METRIC AB here) is one of the most sought after referencing plugins on the market for mixing and mastering engineers alike. And now, with the new Streamliner (which I was an Alpha tester for), is going to be the MUST HAVE for ALL mastering and mixing engineers in the modern era. No joke! So lets dive in deep into plugin development and how this all goes down behind the curtains.
BOS – What is your role in the plugin industry? Walk us through a day-to-day basis for yourself.
Marc – Strictly speaking, I’m a product owner/designer/stakeholder. I come up with the concepts for plugins when I’m working on music, write them down, do a little design work, then start talking to my development team and other music producers about the ideas. If they have legs, I get deeper into it, and start sketching out the concepts and working on specification and use cases.
On a day to day basis, it’s Emails, Skype, Basecamp, spec docs, design work and maybe a little bit of testing in Logic or Ableton. It’s all about pushing the project further, keeping momentum going, dealing with the problems and keeping the faith in the project.
BOS – Plugins are obviously this biggest part of the audio industry in recent years, and have been for quite some time. How much has the plugin industry grown when looking at it from the inside?
Marc – Well, I’m old enough to have already been around when Steinburg invented VSTs, and it’s been growing steadily ever since. But in the last 5 years we have seen an exponential rise in the number of developers and products. I think the main reason for the explosion has been that there are two sides of development; the fun stuff – like DSP and the boring stuff ‘the framework and SDK’. Believe it or not, the SDK (software development kit) takes longer to get right, and encompass so much more tech than a lot of the DSP side. So if you where a fantastic DSP developer, you still had to spend a hell of a lot of time developing an SDK, framework and libraries to do all the boring stuff like UI, audio routing, automation handling, file reading, text and graphic displays etc. Then, there’s the formatting for the different plugin types, VST, AAX, AU etc. That’s why some developers never released AAX or windows versions of their plugins. Because they didn’t have the time, resources or motivation to work out all the problems themselves to take them there.
So, the big breakthrough came when tools like JUCE came along and solved so many of the tedious problems that every developer needs to solve in order to produce all the formats. Now any developer can use JUCE as the foundation of their product, and to produce industry standard formats without the hassle of doing it all yourself. When you look at all the effort everyone was making just to solve the same problems, and replicate the same technology, it’s no wonder that JUCE has had such a big impact on the plugin boom. Well done Jules and the JUCE team for taking the pain out of the proverbial a** of development.
BOS – As a plugin is developed, what are the stages that are done to make it from concept to reality? What does it take for a plugin to be born?
Marc – It all starts with an idea, sometimes that idea is a “what if?” as in, what happens when I mess around with this DSP, what sounds can it produce?
Sometimes it starts with a pain point – why is it such a [pain in the butt] to do this right now, and how can we make it easier and better?
And other times, it’s as simple as ‘I want that vintage hardware sound in the box’.
Once you have the concept, you need to break down the use cases to inform you about the design and technology required to produce the outcomes you desire.
UX is a big factor with plugins that are either complex or totally new things that don’t have an established way of working. You really need to work hard here to make sure that the user experience is seamless. It’s a lot of hard work iterating and refining the workflow to ensure that the user doesn’t ever see how complicated things are working in the background.
Then you move onto the developing the technology, prototyping, testing and iterating it until you get to the Alpha version. Once you have a stable alpha, you can refine the final design and snag all the operational bugs and produce a beta. After a few rounds of beta testing, and listening to the users feedback, you produce the Release Candidate (RC) and if all goes well, you got yourselves a release!
BOS – How long does it take to develop a plugin?
Marc – I will give you the answer that most developers give me when I ask them the same question – ‘It Depends’, and that is the most honest answer I can give you.
BOS – You are known for one of the best known referencing plugins (for both pro’s and beginner producers) with your plugin Metric A/B released on Plugin Alliance. Can you give us some behind the scenes info on how this came to be?
Marc – The truth is, I never ‘wanted’ to create plugins, I am not a developer, so I never tinkered with code, and I was happy making music with all the great plugins that were out there. Until, one fateful day when I was getting very frustrated trying to reference tracks while doing a mix.
I had several reference tracks that a client gave me, and I was doing all these workarounds to try to A-B the references with the mix I was working on. Jumping between iTunes and Logic, and Logic became very laggy. Trying to loop sections of the reference track just wasn’t happening with media players. Trying to juggle solo’s and mutes to hear sections of the reference in Logic was awkward and cumbersome. It all just felt wrong. I knew one of the biggest problems was that I was losing vital information by not being able to instantly compare the two tracks with a simple A-B process.
So I started to imagine the ideal way to do this, and I saw a parallel with switching systems that are used to switch between sets of monitor speakers in the studio. That was the genesis of the A-B button. It seems kind of obvious, but why was no-one else doing it? The next thing I looked at was DJ software, this informed me on the handling of Cue and Loop markers, waveform representation etc.
I started with an open mind, and just pieced it all together over the evening with photoshopped bits of screen grabs of plugins and some fine herbs.
After studying all the workflow habits and potential use cases, I produced numerous iterations of the layout until I had something solid that worked for 99% of the situations I envisioned. At this point I started showing it to my producer friends to see what they thought. I had plenty of ‘yes m8, I need you to do this’ and quite a few ‘that’s stupid I don’t need to reference tracks to do a good mix’ and it even caused some producers to defend their workarounds as better than using a plugin.
But the real takeaway was that there were plenty of guys who thought it was a great idea and would use it, so that drove me to get it done.
If you ever read a ‘new product’ thread on Gearslutz, you will notice that there are always three types of comments from those camps; it’s either ‘i don’t need it’, or ‘thats stupid’ or the ‘wow, take my money now!”
BOS – I am not sure I am even allowed to mention this, so feel free to ignore this question, but I know you have a new plugin about to be in Alpha testing… can you shed any light on this? If it’s not too soon, of course.
Marc – The new plugin from ADPTR tackles the contentious and confusing art of mixing and mastering for Streaming platforms. For better or worse, Streaming has become the primary way we listen to music now, so something needed to be done, and we’re doing it.
*** Since this article was written it has now come out on Plugin Alliance. The plugin is called “Streamliner”.
I, personally, was very excited and grateful to be an Alpha tester for this plugin due to my career in Mastering. It is a God-send plugin for knowing how your master will end up (sounding and levelling) on all platforms, while also allowing you to A/B and continue your workflow. I will be doing a breakdown article on this soon for here at Black Octopus Sound. Check it out HERE! or watch the video HERE
BOS – How many people are typically involved with getting a plugin made? What roles do they play?
Marc – Well, you have some one man operations that design, specify and code their plugins as lone wolves, and on the other end of the spectrum you have bloated teams where the developers are instructed by the product designers who are handed directions from the marketing team who get their orders from out of touch CEOs who are pandering to their VC guys.
ADPTR is on the lean side, and we like it that way. I have a small team of highly skilled developers who work on specific aspects of plugins, and we come together to produce the final product. I handle the concept and design, and get help from a talented UI designer to ensure that the final look of the product is as functional, professional, and beautiful as possible. Once we have a product we then have to do several rounds of alpha and beta testing and QC to ensure that it is close to perfection as possible before it gets released. The team at Plugin Alliance has been amazing at helping us raise the bar of quality and reliability that is essential for a professional application.
BOS – Do you think plugins can replace analog gear? And if not yet, do you think it will happen someday?
Marc – I’d say that analog is only half the story, hardware is the other half, and plugins won’t ever replace hardware as there are always scenarios where hardware is a better option.
But we have also seen the rise of software in a box as a reliable and high quality solution for live events and just from an inspirational and performance vantage.
As far as analog modelling is concerned, yes, some plugins are so close to the real thing that you can’t tell the difference in a blind test, but one thing that software will never replace is the lust and fetish for analog equipment. When you want to experience the sensual connection with an analog synth or feel the heat from a tube compressor as you rotate the knobs, you cant and won’t ever get that feeling from software.
BOS – Where do you see the future of plugin development? Do you see a bubble bursting any time soon? Will there ever be too many plugins?
Marc – If we go strictly by quality and original ideas, then there are already too many plugins that just copy something else or don’t meet the sound quality gold standard. But there are plenty of good ideas still to come, loads of super helpful utilities that need to be made to make life easier, loads of classic FX that could be reimagined to be more effective for current product styles and let’s not forget all the breakthroughs in DSP which will expand sonic frontiers in ways we could only imagine a few years ago.
As far as the bubble bursting, I have thought about this, and for an analogy I look at the guitar pedal boom as a parallel scene that has exploded in recent years.
What’s really happening is that technology has become more democratised, the barrier to entry is lower and access to components and fabrication processes has become easier for everyone. It’s no longer a centralised marketplace with a few big companies dictating the market and innovating technology. It’s now in the hands of anyone who has ideas, drive, passion and some financing options.
The amazing thing is, If we have ideas, we can connect with like minded people anywhere in the world to complete the skill group necessary to produce a finished product.
With more diversity in ideas, the scene attracts more diverse creative types who are drawn to a type of tool which helps them express their personal style and suits the creative workflow much better than the homogenous designs that typically roll out from the larger corporations. It’s not just a case of the pie being sliced into smaller pieces, its the fact that the pie now has more flavours and textures than ever before. This means that more people are going to find their ideal slice of pie, which is how it should be.
Thank you to Marco and his team for all that they have done in the plugin world! Be sure to check out his latest plugin Streamliner HERE, and his well known hit pluging Metric A/B HERE
Going Deep with Dubstep Sound Designer – Interview with WB x MB
Dubstep is one of the best known genres of Electronic Music lurking around for over a decade. Giving powerhouse basslines a whole new meaning, it has evolved from something built for dark underground clubs to something made for arena’s and mainstages at the worlds biggest festivals and events. So, it was an easy choice on who will take the reigns on the Going Deep interview about Dubstep and its sound design. The one and only WB x MB, who are our biggest selling sound designers for their sample and serum preset packs that you can see HERE! And we JUST released their brand new one “Mid Tempo & Hybrid Dubstep 2”, check it out HERE!
But first, a little background about them!
WB x MB have signed tunes to the world’s largest dance competition WORLD OF DANCE, and KJ Sawka’s Impossible Records, along with releasing on labels such as Play Me. Their releases hit the top of the charts in Hip Hop, Dubstep, and Glitch Hop over the years, and their “Enemy EP” went #1 on the first day. WB x MB have also shared the stage with such big names as Skrillex, 12th Planet, Kill the Noise, Doctor P, Flux Pavillion, Funtcase, Cookie Monsta, and many others.
Today we take the dive with Greg O. (We Bang) and Mister Black from WB x MB, about what goes on behind the scenes and in their studios with their Dubstep and Riddim sound design, along with their own productions overall! Welcome to a heavy bass edition of Going Deep!
BOS: Dubstep and Riddim have evolved so much over the years. It may be much different than the first style of Dubstep that emerged, but since the heavier bass styles began, it seems to have stayed true to a certain stylistic choice. Why do you think this is?
Greg/WB – I think a lot of it has to do with the sound design, the energy + groove in the track. The sound design itself these days is absolutely unreal but at the same time it all sounds very similar between artist and producers. Then you have this sort of groove that riddim is signature for a very triplet focused or quarter and eighth notes that play a full measure. For instance a sound comes along and it will get used and abused in dozens of big tracks, all by different artists all with the same groove but none of those tracks will sound the same because of what they have done with the sound design and with everything built around the drops.
Mister Black – When it comes to genres of music, there are certain aspects of each genre that set it apart from others. For example, when you hear a distortion peddle with a guitar, you think “heavy metal”. Same is true with electronic music, more specifically Dubstep. With that being said, there are certain elements that make dubstep, dubstep. 140 tempo, half time drum pattern and heavy sub bass. Putting aside sub genres, the new heavy sound has stayed true to these three aspects of dubstep despite the sound evolving into the heavy sound of today. Without these things, I don’t think the vibe would be the same, and thats why you hear a lot of similarities in classic dubstep and todays dubstep, and why its stayed true to a certain stylistic choice.
BOS: What is the difference between Riddim and Dubstep? Where are they the same and where are they different?
Greg/WB – Today’s “riddim” is so much different than what we used to call riddim in dubstep. It’s far more intense and borderline just really heavy dubstep but with that riddim sound design and riddim swing/groove. Dubstep on the other hand is just all of it combined. Whether it’s classic sounding, deep, heavy, hybrid, or even riddim. Dubstep just has no borders and there is so much different sounds, melodies, and grooves. These days it’s almost like what isn’t Riddim is Dubstep.
MB – I would have to say the biggest difference to me is the sound design. Dubstep can have very melodic drops with a multitude of sounds and FX, where riddim is very simplistic and repetitive. You may hear the same sound through out a drop, but the movement will change versus the note or sound. Another difference is Tempo. Not always, but most of the time riddem is at 150bpm and Dubstep at 140bpm.
When you are designing presets for your Serum Packs such as your serum focused pack Riddim Invasion, how do you approach it?
Greg/MB – I make presets to cater to the artist buying the packs. Usually they want to hear a mix between what’s hot and that signature WB x MB style preset which is a bit more left field. I will first start by listening to a bunch of Drum and Bass and then big labels like Never Say Die, Disciple, Wakaan, and anything else I can find. Then I will open up Serum and start to just craft patches based on the sounds that are stuck in my head from all the inspiration I gained from listening. This is typically a daily routine while we are building presets for a pack.
MB – It honestly depends on the day! Sometimes I’ll just start routing things and trying different automation combinations and go from there. Other times I might get a sound stuck in my head and then do everything I can to try and recreate it.
What about your samples and one shots/loops, can you walk us through the process for making these?
Greg/WB – We have our old process where we basically just write a bunch of small Dubstep or Riddim Loops 8 bars long using all our presets as if we were writing the drop to a bunch of tracks. From there we would take an 8bar bounce to stems and just cut loops and one shots. On this new back Mid Tempo and Hybrid Dubstep Volume 2, We went completely different and designed loops completely different where we just made the loops based on what we were working on that day! IF we were writing bass loops we would just write a craft little bass loop using a preset or two from our pack.
MB – Loops are one of my favorite parts of the entire process. Much like writing presets, I’ll approach samples from multiple angles. Sometimes I may have a melody, or an idea for a drop. Other times I may try and find 5 or 6 different samples or patches that I know will work well together and then start writing from there.
Are there other genres you guys listen to outside of Dubstep and Riddim? And if so, does this influence the way you do sound design for these defining genres?
Greg/WB – Sample Packs they take a long time to write. We put tons of hours into these things and listening to the same sound over and over and over can get a little exhausting so I will throw on Drum and Bass and any other bass influenced electronic music or EDM in general. Also just a lot of mainstream pop or rock stuff to. It all influences the sound design because it just kind of clears your head and allows you to be mentally focused and have a sort of free feeling when writing new sound design.
MB – Oh absolutely!! I listen to everything from Frank Sinatra to Slayer, and everything in between. I listen to a lot of classic reggae. I love the 80’s synth pop sound. I definitely can hear these genres influencing our sound design and writing.
What are the key elements to creating sound design for Dubstep and Riddim music?
Greg/WB – I would say quality presets. Knowing serum and how to use all of the filters and lfos and then resampling and processing affects. Plugins from Sound Toys like echoboy and decapitator can really add some extra randomness and character to your reampling and patches.
MB – Honestly, I think having solid wavetables is crucial to expanding your horizons when it comes to designing sound. That and patience and a thirst to keep pushing the envelope.
What are some ‘tools of the trade’ for those wishing to get into producing more Dubstep and Riddim genres? What are your secret weapons?
Greg/WB – A real friendly DAW for creating music like Ableton. Ableton just has really great stock plugins on top of it’s user ability for writing and producing. Then you need VST instruments like serum or phaseplant to get your crazy sound design and other sounds. It’s also really really helpful to have a real good arsenal of samples. The more samples the better. It helps the creativity flow!
MB – Oooooohh secret weapons? We may want to keep some of them a secret LOL! In all honesty, the best advice I can give is, don’t be afraid to ask questions. Take the time to learn things the right way, otherwise you’ll be unlearning bad habits for years. Take your time with the each instrument or sound you want to use, and process them properly. Lastly… Gain stage. Learn how to mix properly, and always have a professional master your track! I heard that Lion’s Den does a pretty sweet job!
When you produce your own songs, do you use your own packs? Do you use other packs?
Greg/WB – We strictly use our own packs now. We used to use a bit of both but now that we are a few seasons in to sample pack writing I know exactly what I need and where to find it. I know our packs just to in depth haha!
MB – 100% our own sound design. I have used samples in the past and there is nothing wrong with using samples. I personally just prefer to make everything from scratch.
What do you think makes sound design for Dubstep or Riddim different to other styles such as House or Techno? How does this approach differentiate in the creation of your sample and preset packs?
Greg/WB – The sound design is meant to kinda tear your head off and blow your mind versus really just grab a hold of you like some good house music. In Dubstep energy and heaviness is a must so you must think out side the box really. You have to really unleash since the sound design is so heavy and technical. Lot’s of layers and switching sounds up to keep the energy going!
MB – I think this has to do with Dubstep and Riddim being at half time. And having the lead bass sounds being the driving force and focal point, versus the 4:4 beat and the short samples used in House or Techno. There is more sound movement between kicks and snares in a dubstep track, so you need to approach sound design a little differently than a 126bpm House track.
Why the name “WB x MB”? Where does this come from?
Greg/WB – We were original We Bang and Mister Black so we just shortened it to WB x MB to make it easier to follow!
MB – [Yes, this and] a long long time ago in a far off land, this dude named We Bang started mastering my (Mister Black) tracks. One day We bang asked if I wanted to collaborate… We then decided to team up, and agreed on the name WB x MB. The rest is history LOL!
So there you have it! Straight from the ‘horses mouth’ as they say! But in this case; straight from the legends themselves! Hope you enjoyed this in depth deep dive of Going Deep with Dubstep Sound Design with WB x MB! Check their original music out HERE!
GOING DEEP WITH MUSIC MARKETING AND MANAGEMENT – INTERVIEW WITH THOMAS GERBRANDS
Today, we are taking the dive with Management and Marketing in Music! This is the perfect ‘tips’ and ‘insider info’ for those coming up, as much as those already established. Thomas Gerbrands is the manager of SHOOK (you may know SHOOK from his legendary Synth Funk style, quirky videos, or his Sample Pack “Shook Synth Funk” we just released HERE). THOMAS IS ALSO THE OWNER OF AN AGENCY THAT FOCUSES ON MARKETING & MANAGMENT IN THE MUSIC INDUSTRY. So, when it comes to killing two birds with one stone, Thomas is the perfect person to speak about both Marketing and Music Management in the modern music world.
Here we go! Welcome to the depth’s of Black Octopus’ Going Deep with Thomas Gerbrands!
BOS: Give me a day-to-day process of being an Artist manager. How does it work and what are you up to ‘behind the scenes’?
Thomas: In essence I see my work as guiding the artist towards its goal. So, it is my job to convert the dreams of the artist into achievable goals and steps. Besides this, I need to ensure we move forward and keep track of the business side of things. In most cases I see myself as the personal assistant of the artist. Not the other way around. I do see this happen a lot. Situations where artists become sort of enslaved to companies and targets of managers. But, the core of music is in the end an artistic process of growth and adventure. To make it sustainable, it is essential to develop a second side and monetise the artistic process. This is where I come in. I become the gatekeeper of the artist’s legacy and assets.
Whether this is from a marketing perspective (artist profile) or royalty perspective (song catalog); it is the same. Business is business. And artists and music can be monetised in many ways. Both assets need to be nurtured and protected. And in most cases, creative people lack the organisation skills and sense of business. You just need an expert to take you there, show you the way and protect you when necessary. That is [my job].
For me, [it is] a good match between an artist and its manager when we complement each other. We both have something the other one does not, and that is why [SHOOK and I] make an excellent team.
BOS: Since you are the manager for one of our highest selling artist-made sample packs with “SHOOK” Synth Funk, can you shed some light on how it is to work with him? How does this reflect the success of his work as a musician and now, a sample pack sound designer?
Thomas: We receive many inquiries for Shook’s work from a strong diversity of industries, and different regions like the US and China. But also entirely different industries like film and commercials as well as journalists and gaming. From the business side, I think it is important not to bet on one horse. As I said, music can be monetised in many ways. Therefore I am always investigating new opportunities. Besides this there is the artistic challenge for Shook as an artist. Not all projects have to generate revenue. Sometimes, if Shook really wants to be part of a project, we take the gamble, just because Shook wants to have the challenge. It is about a true admiration for the creation process. It is about challenging oneself to become a better producer and composer. And it is about constantly evolving into new ways and ensuring your profile will not become that of a “one-trick pony”.
As you can see in the live industry now, due to COVID-19, many musicians have difficult times. It is comparable when vinyl merged into CD and consumers started illegally downloading that digital data. It shows that divide and conquer still is of the highest value. As we now know the virus can kill the entire industry of live events, it is not so complex to consider that a digital virus can kill an entire streaming industry. Who knows? That’s why I always discuss with Shook what challenges we can take and which new ways and forms we can try. We are willing to try everything. Our purpose is to either get exposure towards a new community, fulfill an artistic challenge, or simply make a bit of money to feed Shook’s cat Jagger! The adventure of sample packs was for me quite interesting. As I met one of your associates during a Splice/Kobalt party during Amsterdam Dance Event, I figured that sample packs might be the replacement for downloads and vinyl/CD sales we’ve seen declining in the last decade. I always thought that streaming was the replacement, but it is a totally different model. Therefore I always consider that my assumption can be wrong. To find that out we need to try different things, and [now] here we are! CHECK OUT SHOOKS SAMPLE PACK HERE
BOS: Branding and Marketing with artists has become even more important in modern times than ever before! As a marketing professional with your marketing company, how do you approach this?
Thomas: As I run my own agency in music, marketing and management, I see branding and marketing as two different things. For me branding in relation to artists is about the artist profile. It is about positioning the artist as a brand. As a way or form music lovers [that] can interpret the artist. It has much to do with the tone of voice and posts on social media. I think [thats why] it becomes important to build something over time that connects to your fans. It is not about pleasing all fans, because some will like your style and some don’t. In the core of this type of branding it is about authenticity and authority. When explaining authenticity I always remember one lesson from drama class that I had in high school: The teacher explained that when you play a character or role, it is best not to use weird voices. Just use your own voice, she said. Otherwise it will be very complex to maintain this role on stage. I always remembered that and converted it to a branding approach.
In essence everything you see online is staged. Even the real tearjerkers and truthful stuff you see. It is all a way to manipulate your thoughts and emotionally connect you to the performer. Therefore I believe that as an artist you have a responsibility: It is not only about you. It is also about your fans. Show them the most authentic you, then you do not need to worry about being honest. It is just what you are, or what you want to be.
As mentioned, marketing is different than branding. Marketing for me, means investing one dollar to get two dollars out of it. Marketing is data-driven and is more about analysing revenue and investments to optimise the performance of the injection of capital, time, and human resources [and how it’s perceived]. It is a totally different ball-game compared to branding for an artist. So, long story short? Branding is about positioning the artist profile and making the connection with the audience. Marketing is about selling the assets and optimise the return on investment.
BOS: What are some tips and tricks you can give to the readers or up-and-coming producers or artists wanting to market themselves?
Thomas: Well, all ways lead to Rome. That would be my first one. This is attached to another one, that there is no magic formula. This would be my second one.
Stop believing there is a magic formula or a hidden algorithm that will make you a success. This is externalising your goals and make it out of your control, and hidden in the mist. As I said, all ways lead to Rome. This means that you have to find out what works for you! If that is through a record label, do it. If that is by doing everything yourself, do it! If that is by investing all your time on TikTok making weird dance moves and lip-syncing to it, do it! If that means you invest your time in creating source content for others, like in sample packs, then do it.
If it works for you, then it works. It is important that instant success has much to do with luck. Have you noticed that many of the chosen few that are so talented to break-through by 16 years old, most of the time die by 27? Why is that? Because they are unhappy.
That is why successful people are so easily hooked to drugs. They are unhappy. That is because they implemented the wrong metrics in life [with the wrong focus or demands]. Life is not about money just as much as success is not about money. The thing with money is that you will never have enough. And there will always be a neighbour or someone down the street having more. So, if making money becomes the most important thing in your life, then that is a recipe for destruction. This does not mean money is not important, and you can just do what you want in that regard, but it means you have to be responsible for your career and take steps in a balanced matter [in a healthy way]. Weighting the artistic challenge with the potential revenue is one of those ways. Marketing at its finest!
BOS: We saw that Shook had his music played in outer space by an astronaut! That is INSANE! I am guessing this kind of ‘marketing’ is self-given as a powerhouse way to achieve some following. What other ways has Shook been able to achieve the stardom and respect he has?
Thomas: The most important part of Shook’s ability to work completely independent is because he nurtured his talent. He went to school to explore and widen his talent to enter the professional market. Besides this, he has been working on this independent status for over a decade! So, it is not only about talent, it is about dedication and devotion. It is about persistence and the ability to overcome rejection, because that is even more essential. You can see in today’s industry, many people with talent are not making it, while people without much talent are becoming superstars. You have to question yourself who is the smartest and best equipped person to reach such a goal. It is important to consider that the goal of Shook has never been true stardom. Our goal is to build a sustainable business with the creative work and intellectual property of Shook. It is about challenging yourself as a musician and growing as an artist.
With such an amazing achievement as becoming part of a NASA project and the song “Always” being played in the ISS, is not directly linked to one action. It is derived from a cumulation of actions that make Shook as an artist. Such a success is simply a by-product of making the right decisions for over a decade. What we always try to do to the best of our ability is seek ways to explore audio creation. We are not only musicians and producers, but also sound engineers and artists. We are always looking for new adventures and ways to explore Shook’s talent and find new revenue streams to keep it sustainable. With that said, we are always keen on who we work with and what the outcome is.
We truly believe that we constantly redefine ourselves as artists and entrepreneurs, we widen our view and explore opportunities adjusted to today’s technical developments.
BOS: How did you start getting into the music industry and what has your life been like through it all?
Thomas: I started as a producer myself. Later I found a job in marketing music technology and at some point in my life, I had to choose a direction as my nightlife interfered with my day job. I chose my day job and eventually expanded that to setting up my agency for music, marketing and management. It provides me with the opportunity to work with artists like Shook, but also more on the publishing side with songwriters. The majority of my work is with international clients in the field of music technology and music education. For me. [I approach it] the same as for Shook. I would never limit myself to one-trick and constantly repeating that. For me that is just as insane as a hamster running in a wheel.
BOS: If there was one thing you could change about the music industry what would it be?
Thomas: Bureaucracy! I would love to change the way the royalty system and intellectual property works. For me, it has become an industry upon itself that has nothing to do with creating music. It has a way to scam creators and dilute musicians into contracts and partnerships that are entirely dysfunctional. That is why I believe many creative people are fulfilling a need in other forms than music, slowly but firmly decreasing the artistic outcome of the form.
BOS: If there is one thing you love about the music industry what would it be?
Thomas: Technology! Music and technology go hand in hand. I love the technology that comes from musical instruments and the technology that offers the exposure through all kinds of forms like social media, streaming, films and gaming.
BOS: Do you feel marketing is just as (or even more so) important than the music is these days? I have heard often that music will become “80% visual” in the coming years and moving forward. What are your thoughts on this?
Thomas: Well, there are two things really important in the way we consume audio. It is the evolution of technology and the marketing hypes. For me music is music. In its essence, it is more than sufficient as entertaining value and as artistic adventure. In my short time here on this earth I’ve seen music moving from LP to cassette, passing by MTV, CD and piracy into the streaming age and today’s collapse for live music due to COVID-19. I do believe technology takes the way we consume audio by its hand. It also strongly influences the way the next generation consumes and creates. I suspect that the forms and styles will change even more rapidly. What I do see now is that streaming platforms are quite a boring experience. If I compare it to collecting LP’s and creating artwork, it was totally different. From that expectation I think that the rights owners, like the business people who actually own the music (not the artists), will always seek for new ways to monetise their assets. To actually make that happen they need creative artists and also developers. That is why I think the biggest change in the music industry will come from coding in the digital domain.
To answer your question directly, I do think music will become a more wide digital experience, in which direction this will go I am not sure. But, I am not really impressed by AR/VR at this point. I also do not think that gaming will do the trick [as it is now]. What I do believe, is that live music is trying to find new ways and forms. I think that there will be the game-changer in this respect in upcoming years.
BOS: How has Covid affected your part of the industry? Have you noticed any changes or approaches?
Thomas: As said before, COVID-19 has had a tremendous effect, especially on live music. What I see is that many artists used recorded music to promote their live shows. So, they gave away these valuable assets to make it on stage. I do see many of them realising that they might want to reconsider this approach and look into the value of recorded music and its ways to generate revenue. Plus artists realising that they need to balance their revenue streams to ensure they do not rely [entirely] on one source. COVID-19 affects us all, and our business’. For me it just means that we need to work harder and find other ways to convert a given situation into a profitable and fruitful opportunity. I do not control such things as COVID-19. Nor am I willing to blame others for the situation as it arises. Nor do I want to rely fully on my government to take care of me. So, the solution is – as always – to accept reality as it is and make the best out of it. There are many opportunities to monetise music, even in the live domain.
BOS: If you could say one thing to the up and coming producers and artists reading this; what would it be?
Thomas: Stop comparing your inside with other peoples outside.
Thank you HUGELY to Thomas; and also the amazing work from SHOOK on his latest sample pack out now, here on Black Octopus Sound – such a powerhouse team to work with!
Stay tuned er’ybody; more Going Deep coming soon!
GOING DEEP WITH SONGWRITING – INTERVIEW WITH LUK ZIMMERMANN
Today we will be talking with someone that not only is a near and dear friend of mine, but also my partner and the owner of our studio Influx Studios. Luk Zimmermann is a multi-platinum awarded recording artist and songwriter, and has worked with some of Switzerland’s and Central Europe’s biggest hits; and with many others from around the world. Working as a prolific songwriter and record producer for many years gives him an upper hand in music production. Luk knows his way around the process of songwriting from front-to-back, so needless to say, I couldn’t think of a better person to talk to about what goes on ‘behind the scenes’ in songwriting for studio productions.
So, here you have it! Let’s dive deep into songwriting with Luk Zimmermann!
BOS: Let’s give the readers a bit of a description on what songwriting is and what it means to you. What other elements go into a song aside from the writing part, and why are they just as important?
Luk: Songwriting to me is the base of everything. It’s almost like a language on its own, and a way to express myself with music. Also, great songwriting makes my life as a producer so much easier, and if I struggle in the process of producing I almost always go back into songwriting and try to fix it there. There’s no EQ or compressor to fix a wrong chord. Having both hats on as a songwriter and a producer gives me the ability to really dive deep into the emotional and musical world of a song and makes it a success.
BOS: Songwriting is the life-force of music. It’s the backbone of what makes a song, a song (as you said here). What is the most important key element in songwriting?
Luk: I’m not a technical songwriter which means I’m not over analyzing theory stuff. The only analyzing I do is listening (to probably a million by now) songs and seeing how they work and how they don’t. It helps me trust my ears where they take me when I’m adding new chords, I know it was done in the best way possible. The most important thing is listening, and if you do that and you try not just copy any given chord progression out there, but instead you really try to connect your lyrics to the chords you hear when you sing the melody, then you’ll have a pretty good start into a great song.
BOS: When working on songwriting do you see it as ‘stage in the song creation process’. Or is it just part of a bigger picture, like blending the lines of a songs production or arrangement? Do you prefer to separate the process?
Luk: I prefer to start recording a song when the songwriting is done but as mentioned earlier, I don’t hesitate to go back to songwriting if needed, even during the production. I do everything to get the right chords, the right feeling for the song. The right emotion. If the chorus doesn’t open up, you can add something like a “big hit” sample and a crash cymbal, easy enough; but if there’s the wrong chord at the beginning of the chorus it won’t open up as it should. That one chord can change everything – it’s all about the chords and how they work together with the other elements.
BOS: Do you think theory is important for a songwriter? Or is it more about a feeling thing and having an ear for the music?
Luk: I think it helps but I would never tell anybody to go and learn the theory to write songs. I’m sure a lot of the biggest hits were written without any theory at all. Again: follow your ears. If you listen to what they tell you then thats your music theory book; that’s all you need. You will find Songs you can hardly tell why they work in music theory, but they sound great because a certain chord change just makes you feel a certain way (and it’s not explainable with pure music theory at all.)
BOS: When songwriting for different styles of music, do you approach it differently?
Luk: Not really. But, if someone asks me to write a blues song of course there’s maybe a couple of chords I’d prefer to use for a style like this. But in general, to be brutally honest: any chord progression can fit into any kind of song. It’s all about how it is performed to become that style.
BOS: On any given day when you are doing a songwriting session, what do you start with? Vocals? Instruments? Melody? Lyrics? What works best and why?
Luk: I always start with some chords but often when working with topliners they already have a melody so I will try to “jam” along with their melody trying to find the right chords (this means I’m basically just playing chords until I find the right ones). I often write in teams, which is amazing because it’s like cooking a nice meal together and everybody brings something to it. Their own touch in all areas. [*Sidenote: A topliner is someone that their entire purpose is to write the vocal melody for the vocals. Not lyrics. Not singing. Just the melody.]
BOS: Do you feel that songwriting is as important today as it used to be in the previous decades? If we compare songwriting in modern music to that of ‘golden years’ up until pop idols like Michael Jackson, and Elvis Presley, for example, do you think the techniques have changed?
Luk: I don’t think techniques have changed much. But I also have to admit that I don’t know how Elvis and Michael wrote their songs to be honest. The only thing I see is that today (especially big artists) rely on quite a number of songwriting team members, which means that when they start with a new record, they get hundreds of songs and they can pick the ones they like and what they want to work with. I was part of writing sessions like this a few times. There have always been songwriters writing songs for artists, even back in the 60ies and 70ies, and of course there have always been a lot of bands writing their own songs too.
BOS: Songwriting as a career is a thing. We have spoken about this many time in our work together. I think a lot of new up-n-comers in the music business do not realize that this can be a steady stream of income, and also, inspiration. How do you go about making it a career over time?
Luk: I think songwriting is probably the most stable income in music industry (on the creative side). We all know that songwriting income will stay the same more or less but income from live shows can break away completely, especially in pandemic times like this that we are in right now. Imagine you are getting older and tired of touring around all the time, where else can you turn?
I think the secret is the combination of all of it. If you rely on fees from lives shows only, then that might work for quite a while; but it’s a tough life. Not one everyone is made up for. I feel like I missed big parts of almost 15 years of my life because I was constantly on tour and away from my friends and family. I was away from songwriting!
BOS: We have seen a surge in songwriting camps over the recent years. Can you shed some light on what happens in a day-to-day session at a songwriting camp?
Luk: First of all, I really, really love songwriting sessions. The cool thing is you often meet people you’ve never seen before and you are just there in a room writing a song together for the first time, ever. And writing a song together is so much more than just composing; it’s often hours of quite philosophical discussions about what you are actually writing, and why; plus, it allows me to be on the fly moving along quickly and producing a song in one day. I like this one-day thing a lot because it doesn’t allow you to get lost in details or focus too much. You have to be quick with everything which doesn’t mean you can’t come back and fix stuff the next day, but I absolutely believe in the power of finishing stuff in one day and just letting it all out. We all know that it’s so easy to get lost in searching for the right synth sound (or kick drum); it can take weeks! (hah, just kidding… sort of). But really, it takes eats up valuable time if you focus too much. So be quick and then the songwriting will find its way to easily capture emotions, ideas, chords, and make them work.
BOS: What genre’s do you see benefit the most from songwriting? Do you think a genre like Techno or Dubstep is approached the same as Songwriting?
Luk: I rarely do techno songwriting but yes I think it’s a different approach. It’s often times less about chords and more about the movement, beats and sound sources.
BOS: How can Sample Packs and Presets play a role in Songwriting?
Luk: For me Sample Packs are the new synths and drum machines. They are super inspirational and I use them every day. They are my starting points for so many things and it’s so easy to switch through sounds and find the right kick, snare, synth, loop whatever, and then mess around with and make it YOUR sound by just adding distortion, reverb just what you need. People often think that it’s boring if everybody is using the same samples; but it’s not! You just have to make them YOURS, that’s all.. and that’s basically what you should do with everything in music and songwriting, just as much as producing and using sample packs: make it sound unique! Make it YOU! Then people will come back to you for your sound and will know you for your own unique touch!
Thank you so much to Luk Zimmerman for his time! You can check out Influx Studios HERE.
We have some other great “Going Deep” interviews in the pipeline! Until next time!
7 TIPS TO BUILD A BUSINESS AS AN ARTIST, PRODUCER, OR COMPOSER
WHO DOESN’T WANT TO BE SUCCESSFUL AS AN ARTIST, PRODUCER OR COMPOSER? ALL AROUND YOU SEE OTHER PEOPLE MAKING ONE BIG HIT AFTER ANOTHER, DO YOU WONDER IF THAT IS POSSIBLE FOR YOU AS WELL? LET’S EXPLORE:
The music industry is a complex whole and it can be difficult to find your own way and turn your passion into a business. It is a huge challenge to get the recognition you deserve, let alone getting in touch with the right people. Then when you get in touch with them, do you trust them with your carefully crafted music productions?
We have teamed up with independent artist Shook aka Jasper Wijnands. Shook has been working for years to build his artist profile with a wide variety of sounds and genres. His song Milestones has been featured in the Netflix series Better Call Saul S01E01 and he has done remix work for major artists such as Kimbra, Jamiroquai, Phoenix, Ellie Goulding and many others.
Today he gets close to one million monthly streams from Pandora and Spotify with over 5 studio albums that he has released on his own record label Epicenter. That success was not built in one day. It took true dedication to convert his talent into a sustainable business. And the fine thing is, he has done it completely independently.
That is why we asked him to share his knowledge with you. Get ready for 7 tips to build a business as an independent artist, producer and composer.
IT IS NOT SOLELY ABOUT MAKING MONEY
It is true though, money is important and it is a key factor to make a living out of your music. That said, music is a form of art. The exciting thing is that it easily merges with entertainment, which makes it such a powerful thing.
Today, you can reach millions of people with your creations, both on stage as well as from the comforts of your studio. You can truly touch the emotional side of your listener.
Do you remember when you felt down and listened to that specific song? It either cheered you up or got you even more emotional, right? Or when you were at that festival when your favorite artist played that amazing track?
Music is about emotions and memories. It is about reliving those moments and connecting with your inner self. In its true essence making money and making music have nothing to do with each other. Those are two completely different things.
You have to consider that “making money” is not a particularly smart metric to prioritize within your creation process. Why? Because you will never have enough, and there will always be others making more.
Also, you will lose focus. Money easily distracts you from way more important stuff as family, friends, love, health and allowing yourself the luxury to create.
To ensure you position your passion for music properly, it is wise to focus on building a balanced life. You have to consider that your love for music is about love and passion. Not about greed and obsessions. You really do not want to become that person. As success will simply become your greatest enemy.
It is about building a sustainable business model. A scenario of growth. Allowing yourself to fully focus on what you love to do. That is the main priority. That does not mean everything has to be nice and we all live in a constant state of happiness. Not at all. It is hard work.
YOU ARE THE CHICKEN WITH THE GOLDEN EGGS. YOU HAVE TO TAKE CARE OF YOU TO ENSURE YOU KEEP LAYING THOSE EGGS OVER TIME. THAT IS DONE BY STAYING TRUE TO YOUR INNER BELIEFS.
Music is a powerful tool. And with that great power comes an even greater responsibility. You should handle your skills with care and treat your listeners with respect. That is in the end way more important than making money.
LEARN TO HANDLE REJECTION
Rejection is a daily occurrence in the music business. It is often hard. Every known artist has had to deal with this disappointment. It is part of the process!
Building your career in the music business means that you have to open up. You have to open up to fellow producers, listeners and industry dinosaurs.
The rule is quite simple, you cannot please all people with your music. Consider that everyone is entitled to have their own opinion about your work. That means some will really like it and others don’t.
Therefore, you have to constantly process rejection, it is an essential part of your process. It is exactly that battle that makes it all worthwhile. Without that struggle, it all becomes worthless.
Of course, it is really satisfying when people like your work. It gives you the right energy to proceed with creating. That said, getting negative feedback is also really valuable. It gives you honest insights in what your listeners experience. It is a rocky road, but you can do it. Try to merge that rejection into something of real value for you.
It is about challenging yourself from a professional perspective. The adventure of mastering new skills. And taking your craft to the next level. When people like your music you know you are on the right track. When people dislike your music, you know what to improve.
When sending your music to major labels, they seek something you might not be able to deliver. Do not worry too much about that. Just take that feedback into account and thank them to have taken the time to listen to your work and provide you with some valuable knowledge.
Also, today’s social media is a brilliant way to be discovered and connect with fans worldwide. That said, it is also a little shit hole where people carry out aggressively insulting opinions masking their own frustration. They are allowed to do that. Do not bother too much.
Always look for the elements that allow you to grow by treating every opinion with respect. Do not try to be right and defend your work. Just ask them what you should do to make it better for them? It is their opinion. And that means they are always right.
Try to keep that in mind and try to trigger an honest debate with them. You might even convert a rejection into a valuable discussion.
THERE IS A SAYING, “MAKE A LOT OF BABIES AND THEN KILL THEM”
THIS MIGHT BE A BIT HARSH SENTENCE, BUT IT IS ACTUALLY REALLY COOL. IT IS CERTAINLY NOT ABOUT REAL HUMAN BABIES. IT IS ABOUT YOUR WORK. YOUR MUSIC. YOUR BABIES. WHAT IT MEANS IS THAT YOU ALLOW YOURSELF TO CONDUCT MANY EXPERIMENTS, AND LET IT BE OK IF THEY DO NOT GAIN ANY TRACTION. EVERY PROJECT YOU DO YOU LEARN SOMETHING AND GET BETTER.
Try to challenge yourself without sticking to one genre or style. While making music it is important you understand the creation process. As a producer or artist you are influenced by many other artists, daily emotions and even other forms of art. Try to convert that into new approaches to create music.
Of course you have some kind of end goal in mind. With your music. With your career. That is a good thing. At the same time you want to challenge yourself to become a better producer. Therefore, it is essential that you try new stuff.
Go back in time. What was the music your parents listened to? What music did you like when you were young? Where did you first start? What influenced your musical taste during different periods of your life?
Take those factors and try to create new work from that point. Let go of primary purpose to create the next big hit. That only will become valid at a later point of your career. If you always start a new project with the intention to make the next hit, you are more likely to get stuck.
This tip is about practicing and learning, not about writing the next Billboard #1.
To build your profile as an artist you have to get experience. This is an adventurous route. Therefore you have to give yourself the space to experiment with as many forms and influences you can imagine. Do you think Van Gogh only painted those museum pieces? Not really, right?
To get to that point he made many studies and sketches to master those skills. That is exactly what you have to do. Study, practice & learn. This will allow you to become a more complete artist. You might even want to consider to create music you dislike. Try it. What musical genre do you really detest? Go try to make it. It will be a fun way to explore your true skills and you might even learn some new techniques along the way you otherwise would never come across.
That is about making a lot of babies. The next thing you want to consider that all those project files on your computer are certainly not all fit for release. That is why you should kill some of those babies. This will allow you to form your artist profile. You now allow yourself to get familiar with yourself as an artist. Where is your passion leading you towards? What is your talent? And where don’t you want to go?
It is about creating the why behind your music. In time this will give you confidence about your decisions you are about to make as an artist. You will become more aware of what you want and what you do not want. And that will make it more easy to truly stand for what you make later down the line.
FINDING YOURSELF BEING A SELF CENTERED? BURST THAT LITTLE NARCISSISTIC BUBBLE OF YOURS
As an artist you are building something where you are the central point. That is why many artists become so arrogant. It is a logical human reaction. Think about it. When everybody says you are great all the time, and you make big money with your work, there is a big chance you start believing that you are some kind of chosen one.
That is why you should not do that. You should burst that bubble from day one. Arrogance and ego tripping will close your mind. A closed mind will have a negative effect on your creation process. Both are human defence mechanisms to mask uncertainty and insecurity.
Turn it around. Become vulnerable. Allow yourself to be open and welcoming to any outside influence. It is ok to be insecure and it speaks of you as a creator to be uncertain about your work. This means you are open to receive feedback and transparent about your capabilities. It is exactly that which will move you forward as a creator.
Also, it is not only about personality. It is about giving and taking. When you are only here to take out what you need, what do you have to give? There must be a balance. Otherwise in the end you have nothing left to take. The fertile water of the river will dry up. And you will no longer be able to harvest the crops of your work.
This might be a bit philosophical, but it is in essence related to your growth as a creator. When you are writing music you are inspired by many others. You will also inspire others. That is the simplest give and take.
Also, an important factor of creating a sustainable business is your community. This is different from your fan base. In your community you interact with like-minded producers and artists. You exchange knowledge and ideas. It is really important to be aware of the fact that you are all equal. You are not better than others. Others are also not better than you. You can both learn from each other.
A key point is that you start communicating and opening up in your own community. Try to find one online. Try different ones. There are many forums with really dedicated individuals that nurture those groups without wanting something in return. There are many groups and platforms. Think only of Soundcloud and Facebook. And there is so much more.
It is important to get valuable feedback, you have to start by giving it. Be honest and open. You can be direct, but you do not have to be arrogant. Everybody is a start in its own way. At the same time, that means nobody stands out.
Of course, you have leaders and exceptional talents. They are actually quite limited. Most people who make a difference in the music industry carry two other things with them besides this talent. It is true admiration. Like passion. And dedication or devotion. It is hard work to make it in the industry. By doing so, you have to give and take.
That is why it is so important to not become your self proclaimed superstar. You are just a collection of influences cooked and boiled with your own recipe into something that makes you different from others. That is it. You are not better. Nor is anyone else. You are just different. And the differences are really small nowadays.
In retrospect, there are many other artists and producers that do their utmost best to make a living out of music. You are not the only one. Also, you are not the only one that will succeed. There have been many before you and there will be many following you. Just be sure that in time people will look up to you, like you look up to others. Again, it is a give and take. Handle that with precaution and respect. From day one.
ALLOW YOURSELF TO FAIL
It is about the journey, not the destination. That sentence is widely quoted numerous times on the internet. It is true though. Consider your career to be a journey where you allow yourself to fail to become a better producer. Rome was not built in one day.
You really do not want to become a one day fly. There is nothing more horrible to have had a taste of success and never reach that again. That is more painful than never having tasted it at all.
It is exactly failure that allows you to choose direction during your journey. You know, success is about making decisions. It is about allowing yourself to make wrong decisions. That will only lead to you making better decisions in the future. And that is growth.
Also, it makes sure you really understand what you want and what you do not want with your music. At least that is what mistakes are about. You do not want to repeat them. So you have to do better next time. It is that simple. This way, every mistake you make, carries a certain value. Therewith it is part of your process to grow and become better in what you do.
In the early days of Shook I was part of a big management company. It delivered much remix and commissioned work. It skyrocketed my career. At the same time I did not know about royalties and revenues. I was paid in flat fees. Today I see the value of ownership and getting those royalties. Although those times delivered great opportunities, it was also the time I learned to protect my work and keep control over the business side of my work.
What I learned back then, turned out to be a huge factor in the way I conduct my business today. I learned that besides having this huge success, that eventually to become truly independent, I needed to control my own revenue streams.
That is what I like to give to you. Success is most of the time a crafted PR machine that is showing that on the outside. At the same time nobody knows how it works on the inside. Is that real success? Think about it.
People follow the success. Therewith success becomes a PR tool. As we are in the entertainment business, we are really good at creating things that are not real. Consider every success you see as something you will never know how it is processed from the inside. It can easily be a fake to just grab your attention.
Therefore, never compare your inner self with what you see on the outside of others. You just cannot compare the two. It will lead to a total misunderstanding of success and that will have a devastating effect on your goals and learning curve.
Be a human. Allow yourself to fail. It is about trial and error. Eventually that is the thing that will move you forward. Sometimes you will win, sometimes you only have to learn.
FOLLOW YOUR GUT FEELING
This last tip is about music production and the creation process. It is a really simple trick to become more productive as a producer or artist. As said before, it is great to conduct a lot of experiments and create many different forms of musical works.
But how do you know which are good and which are not?
There are essentially two ways to find out. On the one side there is your community. It is recommended to test your concepts every once in a while with your inner circle. This provides you with some insights from real listeners.
On the other side you have to make your own decisions. Therefore the first minutes of creating any new work are of high importance. Try to get in touch with your inner self. What does your gut feeling tell you? Do you really feel this early concept?
Now give it a rest. Maybe a day or two. Now listen to this again. What do you feel? Do you have that same feeling? Is there magic?
If so, you are creating in line with your primary intentions. This is really good. You can reproduce this and carry on at any given point of time. That is what you want.
If you do not feel it at all, it is simply not worth proceeding. Don’t mind. Kill that baby. It was a good test and you’ve learned that this is just not it. Just stop it and carry on with a new experiment or create more magic with that song you truly feel as a creator.
CHOOSE YOUR CHANNELS AND FULLY DEDICATE TO THE CHOSEN FEW
This last tip is about marketing and your artist profile. Making music is one thing, but getting a steady following and building your artist profile is just as important. Today you have access to so many channels. It can be really overwhelming. That is why you should focus on the chosen few.
In the early days of Shook it was really MySpace. Later it became Soundcloud. Followed Bandcamp and now we live in the Spotify area. I have had reasonable followings and revenue from all those channels. That said, we do focus on just a few at the same time. It is impossible to fully maintain TikTok, Facebook, YouTube, SnapChat and Instagram, while keeping focus on making music. And next focus on all those streaming services. You just cannot do it.
It is about making the decision. Ask yourself which social media channels fit your artist profile in the best way? Where can you have the most growth? And how would you like to interact with your fans and listeners?
Therefore my last tip is choose your battles and fully focus on the channels that work for you. After the tremendous growth of Facebook, we now focus on mainly two channels most of the time.
On the one hand it is Instagram. As Instagram provides a way to show my studio and love for synthesizers. Besides this, it is also a really nice channel to share live jams. And when you grow, it is really suitable for advertisement and it allows newcomers to discover your work through hashtags.
The downside is that it is not easy to link to other sources. That is why the focus is on the growth of the instagram channel with videos and images. And telling my daily story through Instagram Stories.
The connection to a revenue stream is based on Spotify as it delivers the most sophisticated platform with data and especially the playlists are a really nice way to be discovered. It is not about paid playlists.
What we do today is drop live jams on Instagram and connect them with my studio work on Spotify. It allows me to show different sides of my work. My fans and followers get curious and browse my catalog on Spotify to learn more. This is a perfect match.
I hope this all helps you to grow as an artist. As I said, it is about giving and taking. I hereby give these 7 tips to you. If you have any further questions, just call me!
Writer’s Block. Maybe you’re trying to come up with a good hook to complement the chords you just arranged, or maybe a bridge. No matter what you do though, you can’t seem to come up with anything that works. It can often feel like we’re banging our head up against a wall.
For the lucky ones among us, this only lasts a day or two. For the less fortunate…. It can go on for weeks or even longer. There’s a ton of resources out there for dealing with writer’s block in general.
They tell you to take a break and come back to it later, or don’t force it. Some will tell you to wait for inspiration, or to actively search out inspiration.
I think there’s another way.
In Comes Sound Design
Next time you seem to hit a wall in your production, and can’t get anything to work, try this: close your project file and open a new one. Now open your favorite synth. It’s time to create some new patches!
Use your production time to work on designing some really cool sounds and beef up your patch library. These are the sounds you’ll be able to use in the future, or maybe even on the song you’re currently stuck on!
Alternatively, you can organize and process your sample collection. This can be especially helpful if you have a giant mess of tens of thousands of samples with no order. Processing samples makes them your own, and also readies them to drag and drop into your next song.
Don’t Focus on What You Can’t Do
Once you get to the point where the writer’s block is in full swing, you usually can’t just force your way through it. At least for me, the fact that nothing is working is always forefront in my mind, and everything just becomes a self-fulfilling prophecy.
I believe designing sounds is the perfect way to remove yourself from the problem, while still moving forward with your production. I mentioned in a recent article that experimenting with your synth can be a great way to learn how to use it, as well as a great way to generate ideas for your own sounds. This is a perfect time to do just that.
I know how frustrating it is being stuck with writer’s block. You want to get back to work and finish your song, but trust me, you need to step away from it first. I’m not saying don’t do anything with music at all, just don’t open that one project file. You should still be doing something music related every day for even just an hour. (You really need to make this a priority)
Benefits to Designing Sounds During this Time
Some of you may be asking ‘Why should I spend my time designing sounds instead of doing something else more productive, like starting a new song?’ Well, that is one thing you could certainly do. However, you don’t want to get in the habit of just starting a new song whenever things get difficult. You need to get in the habit of finishing songs. When you get stuck on one, take a break, but come back and finish it.
Build Your Collection of Sounds
So, why should you spend your time designing new sounds? Easy. It will make things much smoother for future songs, for one. If you spend an hour a day for one week thinking up new sounds and saving them as presets, you’ll be on your way to having your own personal collection of sounds.
These sounds can be used on any of your future songs, and instead of taking the time to create each one from scratch on every single part of every song, you can just load up the preset you already created!
Try to make a variety of different sounds, from basses, to leads, or pads, whatever you typically like to use.
Get in the Habit of Producing
Another great benefit to creating sounds now is it will keep you in the music production mindset. It’s so important to do something related to music production every day, because that’s how you make habits. If you make it a habit to produce every day, it gets easier to do it even on the days you don’t feel like it.
Imagine spending 30 min every day designing sounds. If you did that for even just a month, you’d see so much progress, you’d be kicking yourself for not starting this sooner! Plus think of how many of your own sounds you’d have collected. I don’t know whether you like to use the same sounds in every song, or never use the same sound twice, but either way you’re going to want more sounds at some point.
You May Find Your Breakthrough
No matter the reason for your writer’s block, by specifically spending time designing new sounds, there’s a very good chance you’ll create something that clicks all of a sudden. It could inspire you to write that perfect hook, or melody, or whatever it is you need to help you smash through that mental barrier that was holding you back. Sounds can do that very easily.
I’ve had that happen a few times already. By focusing on the sounds themselves, I’ve accidentally created something that gave me a really cool idea, and before you know it I was putting the finishing touches on my song!
When that happens, just go with it. Just because you’ve dedicated this time to sound design doesn’t mean you can’t do anything else. If inspiration strikes, let it do its thing!
Now it’s on You
Reading about how to break through writer’s block is good and all, but if you don’t actually do anything about it, it’s useless! If this is something you’re struggling with right now, I want you to stop reading and go open your DAW and create some sounds! Tune out all other distractions and really focus!
If you’re not currently in this predicament, keep this in mind just in case it happens sometime soon. I still recommend spending some time each day specifically for sound design, but at least make sure you spend some time doing something musical every day.
Action:
Beginner – Regardless of whether or not you’re stuck in your production, start spending at least 30 min each day for the next week designing your own sounds. If you’re not sure where to start, go check out my article on Reverse Engineering Presets. That will help you begin to learn your synth and give you some ideas to work with. (Or if video is more your thing, I have that covered too)
Advanced – Start building your own collection of sounds now. You never know when you’ll be able to use them! Spend at least 30 min each day for the next week coming up with new sounds. Make sure you cover all the different types you’ll normally use (bass, lead, arp, pads, etc.) Try to make at least 5 new sounds each day. This will significantly speed up your productions in the future, or at least give you starting points for your sounds.
Question: When was the last time you got stuck with writer’s block? What did you do to break through it? If you’re currently stuck, try this out for a few days and let me know how it goes!
Top 4 Tips For Writing Hit Vocal Melodies
With these four tips, we are going to consider some powerful concepts to keep in mind when writing a vocal melody. As producers and songwriters we often heavily rely on intuition, instinct, and raw emotion when writing. This is great and are definitely the foundations of a good song. However sometimes these raw ideas won’t engage and communicate emotion to our listeners as much as we’d like them to; that’s where “song craft” comes in. Once you start to dig a bit deeper and study the melodies of popular artists across multiple eras and genres, from The Beatles to Taylor Swift and everything in between, you’ll see that there are many techniques they have in common. This is no coincidence – the writers have understanding of the “craft” of writing an effective melody. So, let’s get going and explore some of these techniques.
TIP 1 RHYTHMIC CONTRAST
Engaging, varied rhythms are crucial to modern melodies.
The intricate and syncopated rhythms of rap have had a huge influence on modern melody writing. Engaging, varied rhythms are crucial to modern melodies. Try to utilize a wide range of rhythms from quick fire 16th notes, to long sustaining notes lasting a full bar. Much like a producer working on a track, it can useful to break your melody up into 8 bar chunks (or 16 bars if working at a fast tempo). Every 8 bars be sure to have a different rhythmic focus to your melody. So, if your opening idea has slow, sustaining notes, you should consider a more wordy, rhythmically complex section to follow. This gives a sense of a movement and anticipation that is satisfying to the listener.
BY FABRICE SEYDOUX
Examples:
Dua Lipa – “New Rules” /1st 8 bars 8th notes phrases / 2nd 8 bars long sustained notes (followed by a few 8th and 16ths) / 3rd 8 bars mostly 16th notes / – https://www.youtube.com/watch?v=k2qgadSvNyU
Haim – “Now I’m in it” – packed with rhythmic contrast and syncopation – opens with fast conversational 16ths, then sparse staccato words “we cannot be friends…” & finally more sustained connected notes “Cos now I’m in it, but I’ve been trying to find my way back for a minute” – https://www.youtube.com/watch?v=G-UnzRM24IM
TIP 2 MELODIC CONTRAST
We have lots of options available to us when putting a series of notes together. For example a melody could gradually ascend up a scale throughout a whole bar, or in contrast it could descend from a high notes down to a low note, it could focus on going back and forth between just two adjacent notes, or it could even leap from one note up a whole octave, creating some serious impact. Just like the rhythmic contrast, most great vocal melodies will use a range of contrasting melodic movements in order to take the listener on a journey. Try and be aware of the melodic movements you are using and keep them varied. If you have a section that just goes back and forth between a couple of adjacent notes, try out some bigger gaps in the next section. Or, start with an ascending melody, then do the opposite and go down the scale in the next section. There are infinite possibilities, but the key idea is to use a range of different techniques throughout a melody to keep your listener engaged in the story you are telling.
Examples:
Naughty Boy ft. Beyoncé & Arrow Benjamin “Runnin’ (Lose It All)” – the opening verse is characterised by a melody that travels down through the scale, whereas the chorus climbs up through the scale – a perfect contrast – https://www.youtube.com/watch?v=eJSik6ejkr0
David Bowie – “Starman” – oh yes, I’m going back to 1972 for this example – the verse is mainly small interval gaps, whereas the chorus has huge impact with an interval of a whole octave jump on the word “Starman”) – https://www.youtube.com/watch?v=tRcPA7Fzebw
Katy Perry – “Roar” check out how the opening melodic idea contrasts descending and ascending movements – it creates melodic contrast within the first 15 seconds of the song) – https://www.youtube.com/watch?v=CevxZvSJLk8
Extra tip: it can be a bit tricky to pick out these melodic movements as first, but a really useful exercise is to listen to a melody you love and try and play the notes on a keyboard, you don’t have to play it well or learn it by heart, the key thing is noticing the intervals between the notes and the direction of the melodies in the song.
TIP 3 – PEAK AT THE CHORUS
The chorus is the emotional and energetic release of a track and this should be reflected in the melody. As a general rule you want to save your melody’s highest note for the chorus. Conversely your verse should show some restraint, easing your listener into the story and giving the music some room to breathe.
As a general rule you want to save your melody’s highest note for the chorus.
It’s common for the melody to be slower and more sparse at the beginning of a track allowing for a build up of complexity and intensity (however, check out the Haim – “Now I’m in it” example from point 1 – the opening vocal is very fast – it’s the relaxed delivery and low register that eases us into the track here).
Saving those big high notes for the chorus works for a number of reasons. Firstly, they will physically push a vocalist harder on the chorus, just when the listener wants to hear that emotional release. Secondly, the track arrangement is likely to get busier and more energetic – the louder more intense vocal is going to reinforce that and also cut through the arrangement better. Thirdly (if you really need another reason) there’s going to be a great contrast as we step back down in intensity for verse 2 and start the climb up to the next chorus.
Examples:
Calvin Harris & Disciples – “How Deep Is Your Love” – the verse uses short phrases followed by plenty of space and the vocalist is at a low intensity part of their register. The chorus is much more intense and commands our attention – the notes are higher and there is much less space for the track. – https://www.youtube.com/watch?v=EgqUJOudrcM
Clean Bandit – Symphony (feat. Zara Larsson) – again the verse is quite sparse and relaxed, the pre-chorus more wordy and intense and the chorus is an all out belter with some seriously high notes! – https://www.youtube.com/watch?v=aatr_2MstrI
TIP 4 – USE VARIOUS TYPES OF REPETITION
When you start out writing, using repetition can feel a bit unnatural and might even feel a bit like cheating; however there is some form of repetition in all great melodies. It can come in many forms and usually various techniques are used in one track. A memorable melody will often be made of phrases that repeat exactly the same notes and rhythm but with a different lyric. The trick is to have various contrasting phrases, as explained earlier, to maintain the interest, but also use repetition so it is not too overwhelming and sticks in our memory.
Another form is complete repetition – same melody, rhythm and lyric. This is usually better for short phrases and creates what could also be called a hook. These are little snippets of melody that we can’t help singing along to when we hear a song on the radio.
Lavc55.18.102
Examples:
Dua Lipa “New Rules” – the opening line “Talking to myself at night making myself crazy” is followed by an identical phrase “Wrote it down and read it out, hoping it would save me” – if you played the notes on a piano the two lines are exactly the same. In the same phrase she also uses complete repetition – she sings “Out of my mind” twice at the end of the opening phrase. https://www.youtube.com/watch?v=k2qgadSvNyU
Zara Larsson – “Ruin my Life” – as with the Dua Lipa example the verse is made of a phrase which is repeated but with a different lyric. Complete repetition is also being used, she repeats “I miss you” three times in the opening verse with identical phrasing. – https://www.youtube.com/watch?v=3OTjFqWcDQY
CONCLUSION
Once you get an ear for these techniques, you will hear them everywhere. I could have switched on the radio (which is actually what I did!) and used the vast majority of popular tracks as examples. As you practise using these suggestions they will become second nature and you won’t have to deliberately put them into your songs in a way that might feel contrived. That being said, often if you’ve written something that isn’t quite working, most ideas can be improved by re-writing with these techniques in mind. Looking back over previous songs that didn’t quite work, you might ask yourself the following:
Does the melody have much rhythmic interest and contrast?
Is the melodic movement a bit samey? Could an ascending/descending line, or some big intervals jumps bring it to life?
Is the chorus acting as a big emotional/energetic release or is it at a similar intensity level to the verse & pre-chorus?
Is there too much “information” for the listener to take in? Could you remove some lyrics and/or musical phrases and use some repetition?
You never know, you might take an average idea and make it into something people want to play on repeat!
Today we are going deep into one of the most versatile and necessary pieces of audio processing. The good ol’ equalizer (or better known as EQ). In order to get a better understanding of what an EQ does, we have to know the different types of EQ styles and their uses. I will provide you with details on some important types of EQ, along with their pro’s and con’s, and some tips and tricks. You will be able to choose the right one for the right job and get creative with a sometimes less-than-creative part of audio engineering.
Different Types of EQ and their uses.
FIXED FREQUENCY
A fixed Frequency EQ is an equalizer that operates at one or more specific frequencies. This allows you to either boost or cut the specified frequency, but it is fixed and can not be moved. This type of EQ Processing brings us to our next standard of EQ for many years; The Graphic Equalizer.
These are the types of EQ’s typically found in car stereos and are meant to give parts low, mid, or high a boost or cut, all without getting too surgical. In mixing this can be used to add weight to a lighter low end, brightness to a dull high end, to tame the low end, or reduce a brittle sounding high end.
GRAPHIC
A graphic equalizer is a high fidelity audio control that allows you to see the spectrum on a graph, as well as enable you to boost or cut a specific frequency. Each typically have a fixed Q (or width) and can be boosted or attenuated (cut) at the labelled frequency.
Whats it used for?Graphic EQ’s work great for both live and studio scenarios. You can cut or boost problematic frequencies at venues depending on the room and where they have issues. Not always the case, but they have found their way into many front of house engineers mixing stations in the past. It can also be used on a mix bus to help slightly adjust the overall spectrum by band. Some Graphic EQ’s have low-cut and hi-cut, and some have Q-range adjustments to help see how much the boost or cut affects the bands next to the one being adjusted.
Pros & Cons
Pros – Easy to use. Helps get your head around what an EQ does. Easy to cut and boost specific frequencies that may be problematic. Easy to see each frequency graphically.
Cons – You are stuck with what you have. It is not fully customizable beyond a possible Q-range change and even that is finicky at best. Not nearly as movable as a Paragraphic EQ.Not as common in plugin domain as others.
Tips & Tricks
Try using a Graphic EQ on the mix bus and boost the top just a slight touch or cut in areas that may be a bit problematic or standing out. A little bit goes a long ways, and can sometimes let you “listen” more than “see” when you adjust with a Graphic style EQ. Also on a Bass Guitar or Bass, to affect low end and top end attack, you can slide the frequency fader around the spectrum. Listen closely, at some point you will hear either the low end or high end attack adjusted. With a volume boost you can enhance the attack, or with a volume reduction you can tone down an over-exaggerated attack.
PARAGRAPHIC
A Paragraphic EQ is a special kind of Graphic EQ which allows the adjustments of a specific frequency of each band to be adjusted. It allows for customization beyond that of a fixed graphic EQ. Many also allow for the adjustments of the Q and bandwidth of each filter.
What is it used for? Paragraphic EQ’s are used for more detailed and customizable cuts. The famous Waves Q10 is a good example of a Paragraphic EQ with easy to see GUI (graphical user interface).You can use this to cut a very tight or wide Q and can be great for taking out problematic frequencies.
Pros & Cons
Pros – EvenEasier to use for small notches or detailed corrections. Great for all areas of audio. Great as plugins.
Cons – Depending on the GUI it can be an overload for someone new to EQ. Much like a mixer, if you can see the one channel and learn that, you can then learn the one frequency band to use for correction. There are so many on the market its hard to choose which is the “best”. So play around with many and try them all.
Tips & Tricks
Using this kind of EQ to help kill problematic frequencies in your mix is great. You can take down some sibilance on a vocal or maybe a bit too much boom on a kick drum. That guitar that is too abrasive can be tamed and you can mold the sound as you need to relate to others in the mix. Works just as well in Mastering.
PARAMETRIC
There are 3 main types of Parametric EQ:
Fully Parametric which means you can have full control over all elements from bandwidth, to the frequency to the cut and boost of specified frequency.
Semi-Parametric is a parametric EQ but only with a specified 3 band (for instance) and the Q and bandwidth are typically at a set or fixed value.
Quasi-Parametric is an EQ that allows you to control the frequency and gain, but not the bandwidth.
A good example of a Fully Parametric EQ is ProQ from FabFilter. This is of course also a fully digital plugin EQ. Not all Parametric EQ’s are digital! They were always analog until the digital age came to be. This statement applies to all types of EQ’s really.
Whats it used for? Everything! You can literally use it for anything and everything you want. In the Digital Domain they are super clean too so you can adjust in detail without any issue and can choose every single small precision change and adjust as needed.
Pros & Cons
Pros – Very easy to achieve any result you are after in no time at all. Used for all instruments and all parts of audio.
Cons – So many to choose from. I suggest ProQ3 as it is so versatile and great for anything you put it into.It also works as a Dynamic EQ which we will talk about in a second.
Tips & Tricks
Try automating your EQ with a Low cut Hi-Pass or vice-versa and automating it to filter up or down. You can achieve great filter sweeps this way that are fully programmable and customizable. Also try adding an EQ after a Reverb Send and cutting the top and bottom of the signal you sent through (such as vocals). This is an old trick called “Abbey Road Reverb” and allows you to control the top and bottom response of whatever is being sent through the reverb.
DYNAMIC EQ
Dynamic EQ is a very powerful tool that allows you to use the benefits of a precision EQ, but with the help of what a compressor does to a signal. So let’s say you have a cymbal in your mix that is standing out too much, you can program the Dynamic EQ to only react when the cymbal is live, in the specific frequency of the cymbal, and then adjusting how much it gets reduced when the threshold is reached. They are extremely useful in many situations. Dynamic EQ bridges the gap between a Multiband compressor and an EQ.
Whats it used for? Entire mixes, Masters, individual instruments and pretty much everything else! When you need to tame a frequency without hindering any others around it, dynamic EQ is your best bet.
Pros & Cons
Pros – Extremely powerful tool that allows for great assistance in killing or taming unwanted frequencies that poke up in your song or mix. It works great on entire mixes and masters alike.
Cons – Sometimes it is hard for someone to get their head around how to use it. There are also many to choose from, but some are better quality than others. Knowledge of compression parameters such as attack, release, threshold, and knee shape are significantly helpful for using Dynamic EQ’s in a specific and deliberate way. The FabFilter ProQ3 is a great versatile Parametric EQ & Dynamic EQ in one. I suggest checking that out before any others.
Tips & Tricks
Use a dynamic EQ alongside a De-esser when trying to tame down a sibilant vocal or sharp “S” and “T” pronunciations.After the De-esser tames the sizzle, put in a Dynamic EQ and allow it to work its magic only when the “S” or “T” pops through the vocal channel, at the frequencies where they are the most abrasive. Let it pull back in a very organic and natural way. As mentioned before, it is great on entire mixes on the mix bus. Especially for styles of House or Techno where hi hats are extremely important. It is easy to mix a hi hat too hot in the mix, and a Dynamic EQ can help pull it back after it’s already in.
A LITTLE ABOUT MID/SIDE EQ
Mid/Side EQ is more of a technique than just a type of EQ unit.Many Parametric and Digital EQ’s allow for Mid/Side processing. First let’s unpack exactly what Mid/Side means. Mid means Mono and Side means… well… the sides, aka stereo information. So with a Mid/Side EQ (another reason Fabfitler ProQ3 is a king here), you can select to ONLY attenuate the sides from the sound rather than the mono information.
On a full mix for instance, it would be ideal in mastering to keep the low end mono. If you noticed you have too much stereo information below 200Hz, you can cut ONLY the sides, and leave the mono intact. This is useful for club music where you know the Subs at clubs are going to be Mono anyhow! It also works great for Synths and Bass as separate instances of a Mid/Side EQ. Another common mistake that producers make is over doing the stereo field in attempt to get their track to sound “more wide.” Over doing stereo widening, reverb, chorus, or other types of stereo processing effects can create a messy, cluttered, and unprofessional sounding stereo field. You can make an EQ cut in the sides exclusively to tame the stereo field mess a tad.
So there you have it! A run down on some (but not all!) EQ’s and their uses. I hope this answers some questions and gives you some insight into how to use them more effectively.
Compressors – All you need to know!
by Slade Templeton
Compression is part of the game, no matter the stage of a songs lifeline. Whether we are recording, producing, mixing or mastering, compression has its finger print somewhere in the pie. Today we will go over what types of compressors there are, what they are best used for, and some neat tips and tricks of how to use them to take your productions next level.
So let’s start by talking about the different types of compressors. Here is a handy list, and a little definition for each, along with what they are good for and ‘better known as’.
Vari-Mu Compressor – Vari-Mu stands for “Variable Mu (gain), and is made up with tubes. It uses High Gain, but low distortion tubes, and relies on a softer knee. This makes it best suited for Mix-Bus applications, or for when you need that “glue”.
Whats it good for? Mixing, Mastering
What Instruments? Overall Mixes, Drum Groups, Mix Groups
Known Names? Vari-Mu by Manley (plus many tube style compressors from others)
FET style Compressor – FET (aka Field Effect Transistor), are typically a solid-state emulation of Tubes. Its about color. And compared to its brother the VCA compressor, its going to give you more ‘edge’ than the clean VCA. If color is what you are after, the FET can be your friend.
Whats it good for? Production, Mixing, Mastering, Recording
What Instruments? Overheads, Drums, Bass, Vocals
Known names? 1176, 1178
Opti Compressor – Opti (Optical) Compressors are pretty terrific, even for the nerdiest of nerds. It uses a light source that gets brighter as the signal gets louder, and the light-sensitive resistor reacts to the brightness by decreasing resistance. You’re now probably saying “whoa, far out man!”, I know, pretty freaking cool. But don’t let this high tech explanation make you think it will color the signal heavy. It typically wont. In fact, it is made to be very organic, neutral, and even invisible in a lot of ways. Think of the Optical Compressor as Smooth, slow attack, and slow releasing. It can be a bit on the squishy vibe if pushed, and a bit loose if being used timidly. It is also known for its use as a Leveling Amp.
Whats it good for? Recording, Mixing, (rarely but sometimes; Mastering)
What Instruments? Guitar (acoustic), Vocals (for leveling), Overall mix (sometimes)
Known names? LA2A
VCA Compressor – VCA (aka Voltage Controlled Amplifier) is clean. Its brutal. And it can go as hard or light as needed. Technically most any compressor is a “VCA” in a sense, due to the way the type of circuits, but when someone talks about a VCA compressor, they are likely talking about IC Chips being inside that have transistors following your signal coming in (voltage), to determine how much negative gain should be applied. They are fast acting, precise and clean.
Whats it good for? Recording, Production, Mixing, Mastering
What Instruments? Everything
Known names? API2500, DBX160
Difference between a Compressor and Limiter?
Nothing except ratio! In fact, a Limiter IS a Compressor, and vice-versa. Only difference is a compressor turns into a limiter once it hits a 10:1 Ratio or higher (typically). So when should you limit? Honestly, I am a firm believer that a brick wall heavy limiting should not be touched until final stages in Mastering. However, there is others that believe it is great on Vocals or Drums (kicks) in a mix too. So I say whatever works best for your workflow and style! But be weary of over-limiting things just as well as over-compressing. I feel there is already enough compression going on in a mix, that hitting a high ratio brick wall may do more harm than good once you get to the final mastering Limiters. However, high ratio limiting compression can do wonders if used in a Parallel or getting creative with compression.
Enough of the nerdy stuff! What about this getting ‘Creative with Compression’ thing?
OK, yes, we know that a compressor isn’t quite an instrument, but that doesn’t mean we can’t use it like one! One of my favorite mixing techniques is to over compress certain elements in a mix (tastefully), to add nice character when it’s appropriate. A good example of this is using an 1178 on drum overheads, and really hitting it hard, to give it overly compressed saturation. This works wonders on drums overheads and also things like percussion elements. After using the overly compressed settings, then you will want to work with a transient shaper to bring in some of the articulation of transients back from the grave. This followed by a little boost on the top or bottom end, can add some nice harmonic character. Blend into the mix of the dry and not-so-processed drums, and you will see how it gives a nice ‘bed’ of sound to the rest of the drums elements. Another technique is running a Vari-Mu on the mix bus or first stage in your mastering chain. This can add nice glue and character to the mix, in a ‘tube’ like fashion that is usually sought after. This paired with a VCA (faster acting, more precise) compressor, makes for a magic recipe for reaction and sluggish reaction, that can retain the transients while gluing the mix.
Quick tips with Parallel Compression (AKA New York Compression):
A quick run down on what Parallel Compression is; you want to essentially Compress one signal, while leaving another signal dry or uncompressed. This works wonders on Drums. You send all the drums to one aux/channel of compression (high settings * see below * ) and the same exact drum signals to a dry (uncompressed) signal, then blend to taste. Always be sure to run an EQ on the blended signal, to boost the top and bottom as it will lose some from the over compression, and to retain the punch and transients of the drum.
Now that we know more about compressors and some cool tips and tricks, I will sign off with giving you some basic (and starting point) settings for your mixes and productions on some instruments and styles.
Hope these will help you in your epic compression journey; now go make those chart topping hits!
Compression Settings
VOCALS
Type of Compressor: Any (recommend Opti for Leveling, VCA for fast acting)
Basic Settings to try: Medium to Fast Attack, Medium to Slow release (Depending on the tempo and vibe),
Ratio: 2:1 and not higher than 4:1
Reduction: 2 to 3 dB at higher ratio or 3 to 6dB at lower. Listen for fluidity and keeping it working for the style and sibilance.
BASS OR BASS SYNTH
Type of Compressor: VCA or FET
Basic Settings to try: With higher transient style bass, then medium attack and medium release. With smoother (lower sub) style bass’s, and depending on Tempo and Style, slow attack and slower release (to increase sustain) with higher ratios.
Ratio: for more tightness, use higher 4:1 to higher, for a more organic fluid approach, 2:1 to 4:1
Reduction: 2 to 3dB reduction or sometimes higher depending on the compressor and how much you want it to “sound like its working”
SYNTHS
Type of Compressor: VCA, Vari-Mu or FET
Basic Settings to try: Depends on the synth presented. For more jagged leads, Fast Attack with Fast Release for Punch. For slow pads and slower synth styles, then fast attack with slow release or slow attack with slow release will work.
Ratio: for heavier leads; 4:1 and up. For slower pads, 2:1 or 4:1
Reduction: depends on the style and what you want. 2dB to 3dB for looser and mellow gluing (works on the synth bus this way better), or for a snappy lead, higher 4dB to 6dB can work.
DRUMS
Type of Compressor: VCA
Basic Settings to try: Fast attack and fast release typically. (When using as parallel (see above article), then you can get VERY aggressive with it as it’s a purely compressed signal mixed with a dry signal. )
Ratio: 2:1 or 4:1 if on its own, 10:1 limiting for Parallel
Reduction: If by itself on a kit, then 2 to 3dB, if in Parallel mode, depending on the compressor used, you can hit upwards of 10dB or more! Really slam it for Parallel.
GUITAR
Type of Compressor: VCA (electric), Optical (Acoustic)
Basic Settings to try: Electric: Fast Attack and Slow Release / For Acoustic : medium attack and release
Ratio: 4:1 for Electric Guitar (or higher for more sustain) / 2:1 for Acoustic or use the Opti style
Reduction: For a really ‘brickwalled wall of noise’ guitar style, then 10dB is fine for Electric. For acoustic, 2 to 3dB is nice, depending how much you want to bring it into that ‘compressed’ sound and character.
PIANO
Type of Compressor: VCA (rockier styles), Optical (acoustic styles), Vari Mu (for either)
Basic Settings to try: for more transient, heavier top end focused piano, then use a medium attack and let the top end transients through to give it ‘bite’, if you want smooth and ballad style, then use a bit faster attack with slow release, or medium attack with slower release to give bite while retaining the sustain.
Ratio: 2:1 to 4:1
Reduction: 3 to 4dB for heavier piano styles, and 2 to 3dB for smoother.
Don’t forget! We also have a Compression Wizardry course from Steve Roland and Ahee at the Black Octopus Sound home page!
TOP 5 MIX BUS PROCESSING TIPS AND TRICKS
by Slade Templeton
Do you hear tracks on Spotify that sounded so well balanced, where all instruments are BEAUTIFULLY glued together? Well today we are talking all about the stereo Mix Bus (also known as 2-bus or L/R Mix)! A Mix Bus is a channel that you can send all yourbusses or groups to. Think of it as one single channel that ALL of your audio is routed to; which comes right before your Master Channel. It will include all the effects/aux sends and/or subgroups. Ie. You may have a Kick Bus within your larger Drum Bus; which you then send to your final Mix Bus. You are creating a channel for processing the entire mix of your song before sending it away for mastering.
It is important to know that whatever you put onto your mix bus needs to be there from the beginning. There is no use in putting a new compressor onto your mix bus when you are almost done with your mix! I typically start to work on Mix Bus processing once I have my drums levels as close to mixed as possible. Then I get a feel for the gain stage being sent to the mix bus and I will insert a compressor; more on this later.Never overdo your mix bus processing because your mix will eventually end up in the Mastering stage, which is where extra compression, EQ, dynamic control and overall stereo mix corrections will happen. The mix bus is entirely about rounding the mix signal, gluing your levels and previous mix decisions to become a nice and full mix ready for mastering. So lets get started:
Tip number 1 – It’s all about the vibe.
When working entirely in-the-box (herein referred as ITB, means no analog gear used), you may prefer to make it a bit more analog sounding without actually sending audio out of the computer. Your mix bus can help with this! The first stage in my ITB mix bus chain is almost always saturation of some sort. How much? Well, that depends on how much analog sound you have going in your mix already. Many channel strip plugins these days have saturation added and it can really build up over time.These plugin can add a subtle noise to emulate analog and when this build up occurs you get a full on noise floor (or hiss) by the time it hits your mix bus! We don’t want this. One way to help that is to gate each of the channel strips. (This is how it was done in the old SSL console days because all channels had different noise to them. Another way is to turn off the analog character – if the strip or plugin has this option.) The Waves SSL Channel has this option, however Brainworx and UAD do not. So, those would need a gate if too many instances of these plugsare being used. Some plugins I recommend are McDSP AC101 or AC202. The Channel or Tape emulations by McDSP are great; it has been one of the best companies around for many years. The vibe is instant, it sounds fantastic and it also helps to glue the signal and round out the top end.
Tip Number 2 – EQ, but don’t overdo it.
When you’re mixing signals arrive at your mix bus, you will want to tame any undesired overall frequencies. This also will allow you to make per-channel mix decisions. You may see that a 7.8 KHz frequency is poking out. So, do you change this on the mix bus or the channel? If you are mixing then it is always the channel. Go back and find that element and see what’s causing this. However, if it is a rhythmic element that is standing alone, then dynamic EQ is your best friend. This is common trick I do for House and Techno music. The hats are always a big part of a song but their levels can easily become too loud in the mix. This is where dynamic EQ comes in for the mix bus. You can assign the EQ to react ONLY when the frequency is loud enough at that certain part of the spectrum. This gives you more control over the gluing of the mix and allows for even better reaction from the hats without simply turning down. You can let it melt into the mix when it hits the hats too hot, but otherwise it is left untouched. Two great dynamic EQs are Melda MAutoDynamicEQ and Ozone 8 Dynamic EQ. My favorite is the new Pro Q3 from Fabfilter. The reason is because of the fast and easy use of making it dynamic, or not, and having full movement of whatever “Q” or frequency you desire at the time. It’s pure speed and workflow at that point. But all of these EQ choices work wonders, so take your pick!
Tip Number 3 – Stereo? Maybe. Sometimes. Sure.
Stereo imaging is becoming more of a current and new ‘sound’ than ever before. Resist the urge to ever add stereo imaging plugins on your master chain if you are mastering your own music. This can cause some strange phase relations. But when added tastefully in the mix with good ol’ panning of elements, you can get a great desired sound. A good imager is Ozone 8, or if you have UAD; then Precision K-Stereo is great. The biggest thing to keep in mind here is your low end. You don’t want it wide below a certain point, and you can select different bands to make ‘wider’ or ‘narrow’ in Ozone 8. It’s best to see where the song’s 4 points of crossover are, then make the lower band mono. The mid range can remain exactly how you made it in the mix (so keep unity gain/0 point). The top two bands are where you will do most of your widening. Be mindful of the vocals if there are any in your song, as you don’t want these too wide. The mid-high band may not be something you want to add width to. But I do like to make the very top band wide most of the time. This makes for less ear piercing top end and smooths out the top. It also warms up the sound and makes it easier on the ears. So spread the air and keep the lows mono. Play around with it and see what sounds right.
Tip 4 – Glue that glue!
We all hear about gluing the mix or gluing in audio, but what the heck is it? Gluing is making the sounds overall more compact and natural to one another. This can be done in the mix, per element or per channel, when putting them through groups as a sum. It’s like a funnel effect of bringing Drums all together (kick, snare, hats, etc.) and putting them into a sum of a sub-group. On this sub-group you will want to run a choice parallel compression technique or straight compression. However, this isn’t where the magic stops! You can add some glue on a sub-group instance and you can send all these groups to your mix bus. That is where the true recipe for glue comes from! So, on the mix bus, after processing each individual channel and sending them to an aux or sub-group, these sub-groups get sent into your mix bus, which at this point may also have saturation put as an insert before hitting a compressor. The compressor in this approach works best with just a little bit. A good setting to start from is a 1.5:1 or 2:1 ratio, with only enough threshold to bring to a -1 to -3dB gain reduction. The attack and release should both be medium so you are just tickling the VU or input signal. A great gluing compressor for digital approach is Pro C 2 from Fabfilter. It really does the trick and with its handy side chain features you can only compress the top allowing your kick and low end to poke through and give even more punch. Let the gluing begin!
Tip 5 – Headroom and Mastering in mind.
Now that we have great levels, great channel processing and great overall ‘mix sound’, we want to think about mastering. We recognize this song will be mastered, whether this means by yourself, by us at Black Octopus, or anyone else you may choose. You need to mix from the start with enough headroom for the mastering. Many Mastering Engineers request -3 to-6dB headroom. This is just to give a cushion. The fact is, as long as it is not clipping, its golden and ready for mastering in terms of peak level. What about the overall sound and EQ? Some things to look for are too much bass, too much top end, too much of anything really. Don’t over tweak but if you pull up a spectrum analyzer and see you have a huge low end going on you may want to go back into your mix and take it down a bit. A Mastering Engineer can only do so much to clean up a mix when it’s all put together depending on the elements separation in the frequency spectrum. If the kick is too hot and the low end is too much, this will make for a quieter master and less that an M.E. can do. If you want a loud master, it all starts in the mix. This means less huge transients and more compact gluing or EQ. Overall it needs to be clean and all elements need to work with one another. It’s like a big puzzle, you have all the pieces and they need to fit perfectly together in order to see the big picture. In order to do this, you’ll need to EQ, compress and level to give them their own space in the spectrum. Does this mean they ALL need to have ENTIRELY their own space? No, this would make for way too digital and unnatural of a sound but they need to fit snugly together with the right harmonic content between them all. So, approach this on a per-channel basis and use your mix bus to see where it’s headed before mastering.
With all of these tips in mind, I will leave you with this analogy. The mix bus is the bridge between your mix and your master. It’s all about small helping hands along the way that build into a great mix and eventually into a great master. You just need to make sure it all sounds good from the start and the source sound is just as important as the rest. Good samples or good presets and good treatment along the way help when hitting the mix bus. Then use that mix bus to help glide it through and end up in the mastering chain or with a Mastering Engineer’s ears and gear. There is no right or wrong, only what sounds good and doesn’t. The mix bus can be the golden key to give it that little extra bit that takes it from OK to amazing, with only a few quick processing tricks.
TOP 5 TIPS FOR USING REVERB CREATIVELY IN YOUR MIX AND PRODUCTIONS
by Slade Templeton
Reverb can be a delicate attribute in any music style. Too much can make an sound feel washed out, or too far back in the mix. Too little can make an instrument or vocal far too dry and no special sauce. Its about finding the balance using the reverb to bring a mix and song to life. So lets go over 5 tips and tricks for using Reverb creatively in your mix and productions.
1) Using FX sends to get the amount you want
Using FX sends is one of the best ways to get more control over your production or mixes reverb use. This also works just as well with Delays or other effects. The basic FX send means that you send out a bus (lets say bus 1-2) to another Aux channel that will be your FX. You apply full 100% wet reverb on the Aux and you can adjust the Aux/FX Channels levels with the fader. This also will open up a world of options in terms of automation. Lets say you want to hit the chorus hard with heavier reverbs, along with automating things like the tail of the reverb and even tone or character, you can automate the level. This allows you to be able to get full control over sections of the song that may need more or less reverb application while still retaining the sound of the original dry element(s) you send to the fx channel.
2) Using Sidechain to duck the reverb
This is a really handy trick when you are using the technique mentioned above. You can let the reverb do a little more magic, especially with how it reacts once a sound has stopped or decayed away. Lets take a vocal for instance. We would want to send the vocal to the FX send (see above on tip 1), and after the Reverb in the chain, we would want to apply a side chain multiband. I prefer using Multiband such as Fab Filter Pro MB with the expert/sidechain function in place. This allows you to choose which area of the frequencies you want to duck and allows for more control. You then want to send the vocal out another bus (lets say Bus 3) and this will be your Sidechain input (top left corner the Key symbol). Now; in the Multiband allow it to react from the signal coming in from the vocal. Once your vocal is being performed/playedback it will pull the reverb down and once it is done talking or singing, the tails will come back up and take off into another world. This is, of course, if you apply loads of reverb tails. So the decay matters and I would suggest using a long decay. Print as needed and cut or edit. This also works wonders with a combination or Reverb, Delays and Automation BEFORE hitting the side chain multiband.
3) The Beatles trick goes a long ways
I believe I read at one time that it was The Beatles that came up with this very unique process to get haunting sounding reverbs and effects into your song. This originally was done with the a tapes reel-to-reel. Lets take a voice again for this example. You would have a voice ran into a tape reel recorded and then you would flip the tape and play it backwards (already getting creepy); but then it doesnt stop there. After flipping the tape backwards you would apply a very long decay reverb while recording it back in to the next reel. This would then be flipped back to the original forward playback which means the reverb tail is backwards and the voice is forward. Sound confusing? Thats OK; lets break it down for the Digital world.
Step 1 – Duplicate your vocal audio channel
Step 2 – Flip the voice backwards on the second audio channel
Step 3 – Apply a nice reverb with a good long tail. Let it sound like the tails are flowing between the words but still leaving room to breath.
Step 4 – Print (or export) this backwards + reverb vocal channel. (if exporting then bring back into the session.)
Step 5 – Reverse the audio file you just printed or exported
Step 6 – Align the Backwards Reverb vocal to the original dry one and make it so the first words land right.
There you go. Haunting as hell and super cool! This can be used on other elements too like drums, synths or guitars. Whatever you want to make creepy and unique!
4) EQ the Verb
EQ goes a very long ways in the land of Reverb. One of the best tricks is to EQ after the reverb on the reverb fx channel (as we were speaking about with sending reverb to an Aux FX Channel). I suggest doing both a low cut and high cut and pull up and down until it grabs only the areas you want. This way the sibilance of a voice (for instance) wont be caught by the reverb. This can also allow you to warm up or add depth to only certain areas of the frequency spectrum depending on the instrument or sound source.
5) Chain order DOES matter. Experiment
One things to keep in mind that you can add to a chain for fx the same way you would for processing instruments. I am talking Compression, EQ, Saturation, etc. So what do I mean but this? Lets say you want to run a Reverb channel for sending the vocals to and you want more tail of the reverb but also want it to sit better on the transients of the voice. One good technique would be to EQ before the reverb, then run a heavy compression after the reverb. This will give you control on what is reacting to the reverb along with smashing the reverb down to give it more of a glued sound. Also sending the reverb channel to the mix bus is common but try running it back into a vocal bus that is already processing the lead vocal. This will give you even more gluing and will sit even better with the processing your vocal bus chain is doing. Try stereo imagers and chorus or delays. Its endless possibilities!
So now that we realize that there is plenty of ways we can use reverb to spice up our music, I say to keep experimenting and trying new things. Thats how great ideas come about in the first place! By either happy accidents, or because someone decided to break the mold and do something new. There isn’t really anything right or wrong with reverb unless you start talking about certain technical things such as low end or mid/side and where to put the reverb in the mix. But thats for another day and another article. The most important thing is to study up on the different types of reverb such as Plates, Room, Hall, Chamber, etc. And how these can each be applied to what it is you’re working on. I especially like gated reverb on snares and rooms on vocals for the styles I do. But vocals also work great with Plates or Halls. Once again, its entirely up to you on how you want to use reverb in your next production or mix! PS. No reverb on Sub Bass.
Writer’s Block. Maybe you’re trying to come up with a good hook to complement the chords you just arranged, or maybe a bridge. No matter what you do though, you can’t seem to come up with anything that works. It can often feel like we’re banging our head up against a wall.
For the lucky ones among us, this only lasts a day or two. For the less fortunate…. It can go on for weeks or even longer. There’s a ton of resources out there for dealing with writer’s block in general.
They tell you to take a break and come back to it later, or don’t force it. Some will tell you to wait for inspiration, or to actively search out inspiration.
I think there’s another way.
In Comes Sound Design
Next time you seem to hit a wall in your production, and can’t get anything to work, try this: close your project file and open a new one. Now open your favorite synth. It’s time to create some new patches!
Use your production time to work on designing some really cool sounds and beef up your patch library. These are the sounds you’ll be able to use in the future, or maybe even on the song you’re currently stuck on!
Alternatively, you can organize and process your sample collection. This can be especially helpful if you have a giant mess of tens of thousands of samples with no order. Processing samples makes them your own, and also readies them to drag and drop into your next song.
Don’t Focus on What You Can’t Do
Once you get to the point where the writer’s block is in full swing, you usually can’t just force your way through it. At least for me, the fact that nothing is working is always forefront in my mind, and everything just becomes a self-fulfilling prophecy.
I believe designing sounds is the perfect way to remove yourself from the problem, while still moving forward with your production. I mentioned in a recent article that experimenting with your synth can be a great way to learn how to use it, as well as a great way to generate ideas for your own sounds. This is a perfect time to do just that.
I know how frustrating it is being stuck with writer’s block. You want to get back to work and finish your song, but trust me, you need to step away from it first. I’m not saying don’t do anything with music at all, just don’t open that one project file. You should still be doing something music related every day for even just an hour. (You really need to make this a priority)
Benefits to Designing Sounds During this Time
Some of you may be asking ‘Why should I spend my time designing sounds instead of doing something else more productive, like starting a new song?’ Well, that is one thing you could certainly do. However, you don’t want to get in the habit of just starting a new song whenever things get difficult. You need to get in the habit of finishing songs. When you get stuck on one, take a break, but come back and finish it.
Build Your Collection of Sounds
So, why should you spend your time designing new sounds? Easy. It will make things much smoother for future songs, for one. If you spend an hour a day for one week thinking up new sounds and saving them as presets, you’ll be on your way to having your own personal collection of sounds.
These sounds can be used on any of your future songs, and instead of taking the time to create each one from scratch on every single part of every song, you can just load up the preset you already created!
Try to make a variety of different sounds, from basses, to leads, or pads, whatever you typically like to use.
Get in the Habit of Producing
Another great benefit to creating sounds now is it will keep you in the music production mindset. It’s so important to do something related to music production every day, because that’s how you make habits. If you make it a habit to produce every day, it gets easier to do it even on the days you don’t feel like it.
Imagine spending 30 min every day designing sounds. If you did that for even just a month, you’d see so much progress, you’d be kicking yourself for not starting this sooner! Plus think of how many of your own sounds you’d have collected. I don’t know whether you like to use the same sounds in every song, or never use the same sound twice, but either way you’re going to want more sounds at some point.
You May Find Your Breakthrough
No matter the reason for your writer’s block, by specifically spending time designing new sounds, there’s a very good chance you’ll create something that clicks all of a sudden. It could inspire you to write that perfect hook, or melody, or whatever it is you need to help you smash through that mental barrier that was holding you back. Sounds can do that very easily.
I’ve had that happen a few times already. By focusing on the sounds themselves, I’ve accidentally created something that gave me a really cool idea, and before you know it I was putting the finishing touches on my song!
When that happens, just go with it. Just because you’ve dedicated this time to sound design doesn’t mean you can’t do anything else. If inspiration strikes, let it do its thing!
Now it’s on You
Reading about how to break through writer’s block is good and all, but if you don’t actually do anything about it, it’s useless! If this is something you’re struggling with right now, I want you to stop reading and go open your DAW and create some sounds! Tune out all other distractions and really focus!
If you’re not currently in this predicament, keep this in mind just in case it happens sometime soon. I still recommend spending some time each day specifically for sound design, but at least make sure you spend some time doing something musical every day.
Action:
Beginner – Regardless of whether or not you’re stuck in your production, start spending at least 30 min each day for the next week designing your own sounds. If you’re not sure where to start, go check out my article on Reverse Engineering Presets. That will help you begin to learn your synth and give you some ideas to work with. (Or if video is more your thing, I have that covered too)
Advanced – Start building your own collection of sounds now. You never know when you’ll be able to use them! Spend at least 30 min each day for the next week coming up with new sounds. Make sure you cover all the different types you’ll normally use (bass, lead, arp, pads, etc.) Try to make at least 5 new sounds each day. This will significantly speed up your productions in the future, or at least give you starting points for your sounds.
Question: When was the last time you got stuck with writer’s block? What did you do to break through it? If you’re currently stuck, try this out for a few days and let me know how it goes!

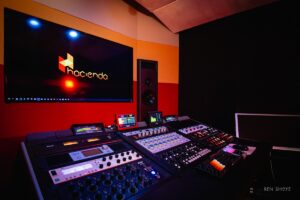
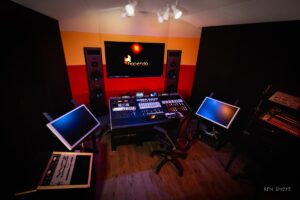
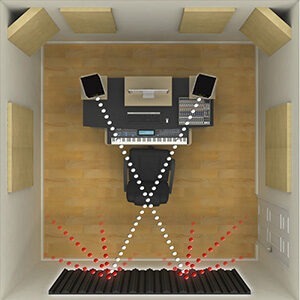
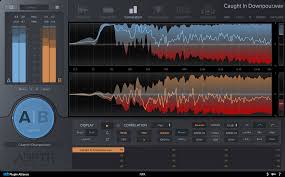
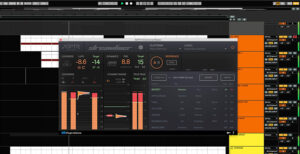


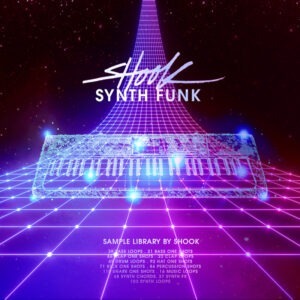


 Don’t Focus on What You Can’t Do
 Benefits to Designing Sounds During this Time
 Get in the Habit of Producing
 Now it’s on You